3 Steps to De-Cluttering Your Computer Desktop & Organizing Teacher Digital Files
Love podcasts? Check out this post in the form of a podcast episode on The Classroom Commute Podcast:
How many times do you waste minutes, hours, or even days searching for the perfect activity or lesson for students that you know you already have? You know the story…you’re about to teach a new unit and you remember a super fun lesson that you know would work perfectly. However, you just can’t seem to remember where you stored it on your computer. You search your desktop and computer files…endlessly. Then, when you finally find just what you’re looking for, you swear to get organized…as soon as you have a free moment.
Well, might I suggest, that that “free moment” is now. I’m sharing 3 steps for organizing your computer files so that the next time you’re on the hunt for that specific activity, it’s at your fingertips in an instant.
STEP 1: START FROM SCRATCH
Be honest - does your computer desktop look like the picture on the left? It's okay - mine did at one point. If you've been chilling in desktop clutter-ville for far too long, it's time for a change. And it begins by starting from scratch. And by that, I mean - it's time to strip down the desktop to its bare bones and build it back up file by file.
I'm calling this Desktop Detox.

It begins by creating one master folder that will house ALL of your teaching files. For example, I taught 3rd and 4th grade, so I had one master folder that was called "4th Grade," and one for "3rd Grade" Inside those file, were sub-folders that broke down all of my grade-related resources into categories. It looked similar to this:

In this step, you're going to begin creating folders starting from broad categories and working toward more specific ones.
If you're like me and teach all subjects, then you don't want a electricity assessment file floating next to an activity about the solar system. Once you've organized by a broad subject/category, then it's time to get major specific. For example, once I've grouped my reading-related files together, I can further break up those files into smaller categories.
Here's what it might look like:
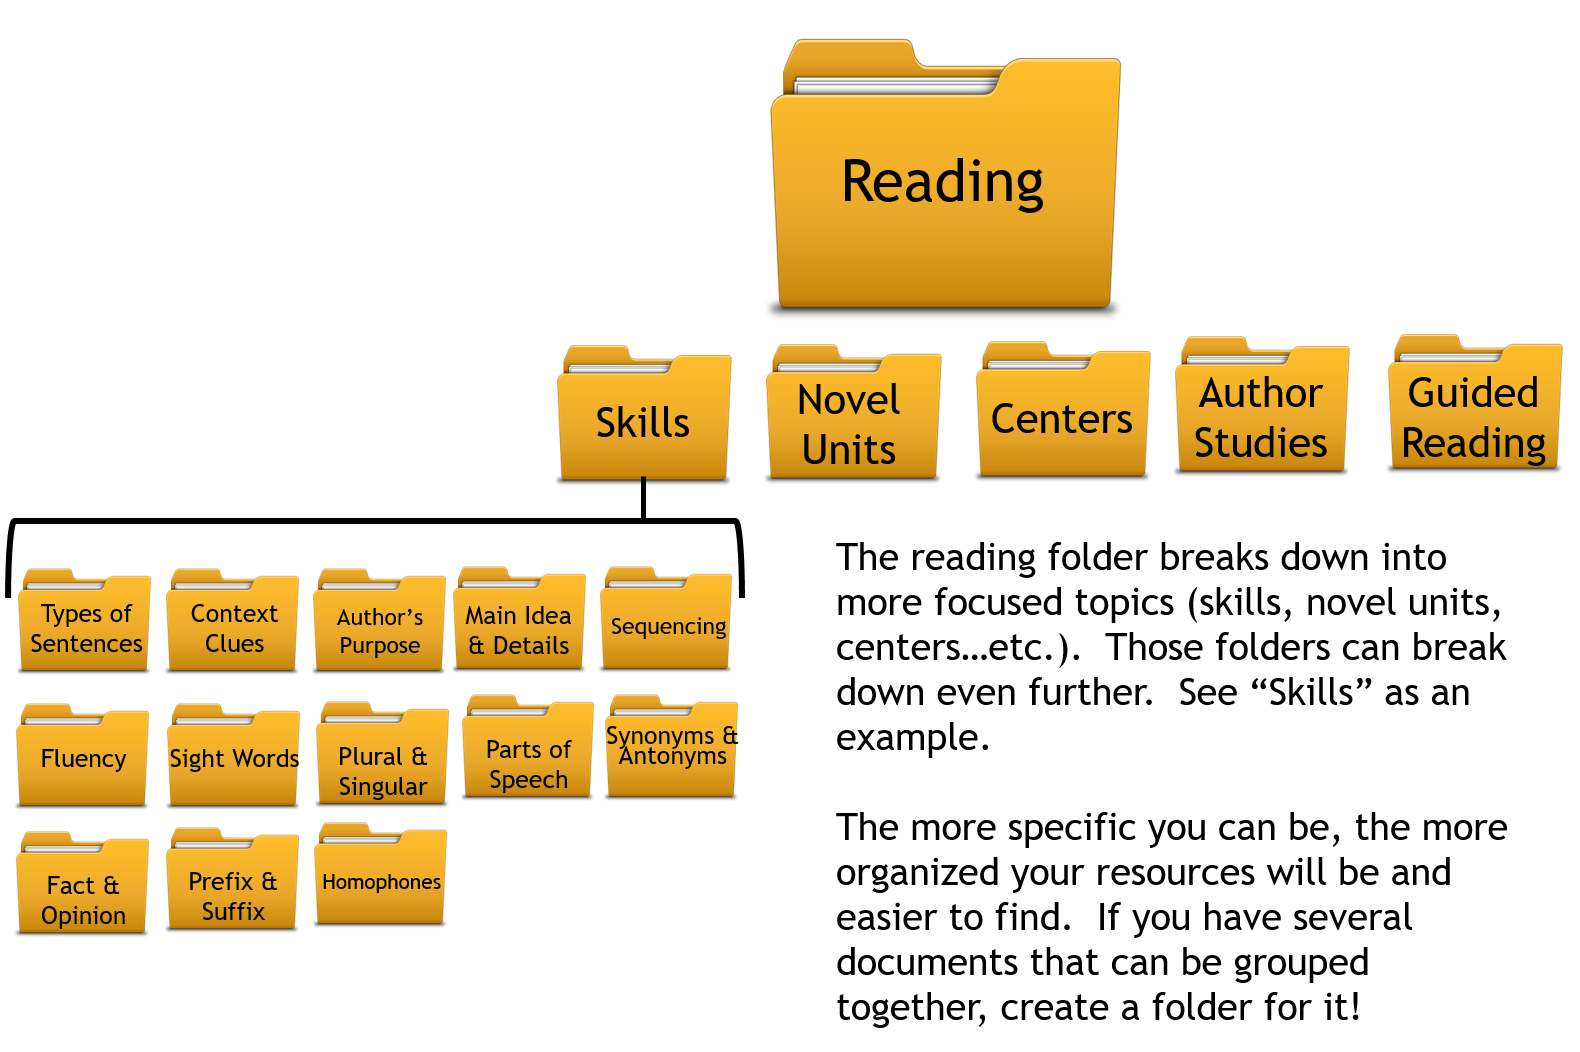
If you feel like you're being too specific, GREAT! That's what it should feel like. The more focused your folders get, the easier it will be to find what you're looking for.
I should note that at this point in the de-cluttering system, you do not need to be filling the folders up yet with the computer files. You are simply creating your framework for organizing your files. We will fill the folders with all of your files later on in the process. In step one, you are just building your folder organization system.
STEP 2: RENAME OR REMOVE
After you've got your new folders organized (without the files put in them yet), you are ready to begin looking at the files that will go in them. If you’ve been teaching a while, you most likely have a ton of computer files. These files can include Word documents, SMARTBoard or PowerPoint presentations, Publisher documents, Excel Documents, and much more.
Some of these files may no longer be current or useful. Remove files that you no longer need. This may include old class lists, resources that are out-of-date, or anything else that you will never use again. If you’re not ready to commit to a complete removal of a file, create a folder for files that you don’t currently use or aren’t sure you can get rid of. This will keep your current and regularly used folders clear of “clutter.”
After removing unused files, go through the remaining documents. Make sure that each file has a clear name that makes it obvious what the file is without having to open it. If the current name is vague, rename the file with a more obvious title. For example, if among your multiplication files you have a file called “homework_1,” rename it with a more clear title such as “homework_1_skip_counting.” This will save you time from having to open files to find what you need later on.
This step will probably be the most time consuming, so break it up into chunks so that it feels do-able.
STEP 3: DIVIDE & CONQUER
Once you’ve removed old and unused files and renamed any vaguely titled files from where your files are currently located, it’s time to fill the newly organized folder system! We’ll call this “divide (your files into categories) and conquer (your disorganized computer desktop/filing system – or lack there of).
Begin transferring your files from their old chaotic location into your new digital filing system by copying and pasting (or dragging) each file into its new digital home. If you find that a file doesn’t fit anywhere, you might need to ask yourself if it’s really something you’ll use or need. If the answer is “yes,” simply create a folder specifically for the lone-some file and you may find that you will add to that folder along the way – but DON’T leave it all loosey-goosey on your desktop, please.