Back to School Series: Launching Readers Workshop

Love podcasts? Check out this post in the form of a podcast episode on The Classroom Commute Podcast:
If you walked in to my classroom most mornings, you would mostly like have found the following scene:
Me - working with a group of small students at the guided reading table, a few students dispersed around the room in bean bag chairs, on carpet squares, or just laying on the floor reading independently, a few more students making reading responses at their desks in their reader's notebook, while others were partner reading.
Oh - and if we're being honest, there was usually THAT kid off task pealing the labels off his crayons. #truth
This scene varied from day to day, depending on what we were learning, but it always followed a certain format. A workshop format, to be specific.
What is the workshop model?
Although it may look slightly different from class to class, typically a workshop model is broken up into three parts:
Mini-Lesson (whole group instruction)
Work Period (small group instruction as well as independent practice)
Closing (whole group instruction)
In the mini-lesson, students are generally gathered in a central area where a teacher will share and model a reading strategy. The teacher will often use anchor texts to help reinforce the strategy and invite students to share things that they notice about the book. The mini-lesson is short, lasting 10-15 minutes.
Following the mini-lesson is the work period. This time is used in a variety of ways. Some teachers use it for students to work on reading centers, while other teachers will use it for independent reading time, partner reading, and/or guided reading time - or a combination of all that was mentioned. One of the benefits of readers workshop is the flexibility it provides to change it up as the year goes on. During the work period, students are practicing skills and strategies taught during the mini lesson, as well as working on personal reading goals. The work period is the longest period of the workshop, lasting anywhere from 30-60 minutes or more.
Wrapping up the workshop is the closing. It is during this time that students come back together to share out how the strategy or skill taught in the mini lesson worked for them during the work period. The closing, like the mini-lesson, is short, lasting about 5-10 minutes max.
Get Your Free Teacher’s Guide to Readers Workshop!
If readers workshop is totally new to you, then I'd love to share with you my "Teacher's Guide to Readers Workshop" from my Getting Started in Readers Workshop Complete Unit where I go in a lot more detail about what it is, how it works, and what it might look like in your classroom. In the guide I give you ideas for what to do during each section of your workshop as well as a video tutorial, which I also share below, for scheduling the work period of your workshop (the trickiest part!).
Free Teacher’s Guide to Reader’s Workshop
Reader's Workshop has a LOT of moving parts! This guide will help you make sure all those parts work together and run smoothly...right from the beginning!
You'll even find a 20-Day calendar of lessons to complete during the first few weeks of using the workshop model!
Preparing Your Room For Readers Workshop
Creating an atmosphere that is inviting for your readers is step one to getting started. Here are some things to consider:
Where will your classroom library be?
Picture what you'd like your classroom to look like. What posters, decorations, reading resources will you include for display? If you have a classroom theme , be sure to incorporate that into your classroom library
Where will your students be allowed to read?
Having pillows, carpet squares, bean bag chairs...etc. is a fun way to get students excited about reading.
Where will students keep their independent reading books and materials?
Some options for this include keeping reading bags in baskets or bins near the classroom library or even at their desks as well as using binders or folders to create reader notebooks for their reading responses and activities (more on that in a second).
How will you organize your classroom library books?
You will want to make sure that your classroom library houses books of a variety of topics, genres, authors, and reading levels. One of the easiest ways to organize and manage your books is by keeping them in bins or baskets. Some of the most popular ways used to organize books include
organizing by reading level (DRA, Lexile...etc.)
organizing by topic or genre
organizing by author
a combination of all the above
What system will you use for checking books in and out of your classroom library?
There are a number of digital tools for keeping track of your books such as using a scanner like the IntelliScanner (affiliate link) or an online catalog like
Book Source Classroom Organizer. You can also use smart phone apps like iBookshelf, Book Crawler, and Book Buddy to keep tabs on your books. Of course, there's also the old fashion sign in/out methods using paper and pencil. Whatever you decide, you will want to teach your system to your students very early on in your school year.
Where will you meet with small groups?
An important component of readers workshop is the time you will be spending in small groups with students. You will need a place in your classroom, preferably a small table, where you can read and discuss books together. In this area you will want to have easy access to teaching tools and supplies such as sticky notes, chart paper or white board, pens/pencils..etc.
Readers Workshop at the Beginning of the Year
Now that you have an idea of what the workshop format looks like, let's talk nitty-gritty.
Specially - let's talk about launching readers workshop at the beginning of the school year. When getting started, your workshop may look slightly different then the rest of the year as you slowly introduce each component of the workshop. Taking it slow at first is critical to readers workshop success!
The launch of your readers workshop is super-duper important and can not be rushed.
The temptation is to dive in to your first reading unit, whatever it may be. I felt this temptation, too. It's like as soon as the first day of school begins, the sand timer of life gets flipped and you feel this sense of urgency because you know everything you need to cover during the year before the last grain of sand runs out. But, let's just slow down for a hot second and really take the time to launch readers workshop right.
We already talked about the 3 parts of the workshop model.
Let's first focus on what your mini-lessons might include in those first few weeks of launching your readers workshop.
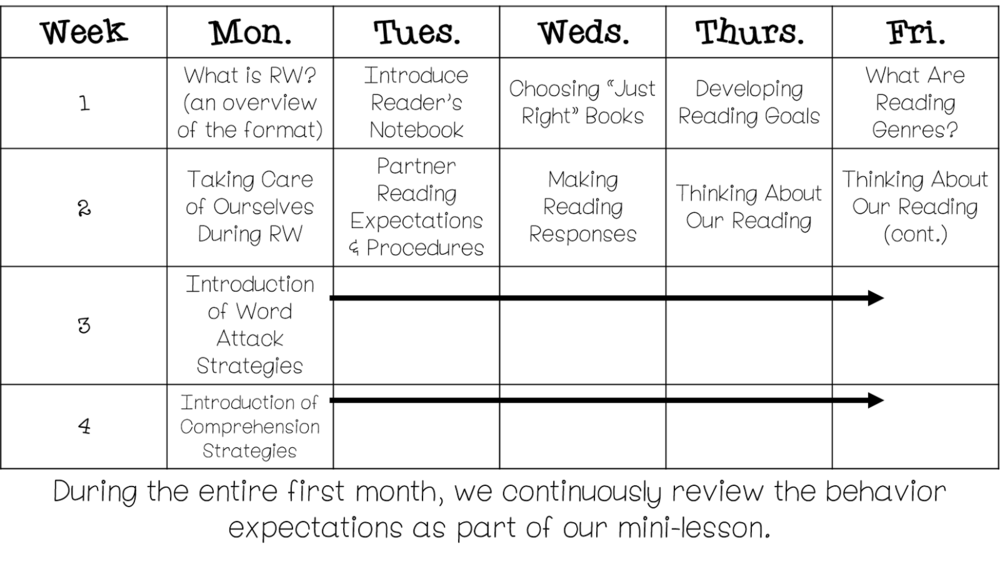
Below you will find a list of the mini-lessons lesson that I would work through during the first few weeks of school. Let me first say, however, that I waited until the first full week of school to launch. Often times we would start school on a Wednesday or Thursday and I found that if I started with only a couple days in a week - the weekend was just enough time for students to forget it all. Plus, you're doing those back to school activities anyways.
On the right are the topics we covered during the first 4 weeks.
You will notice that much of the first two weeks is a lot about appropriate behaviors and routines in readers workshop. However, it's nice mix of behavioral/routines/expectations along side some actual reading instruction (choosing "Just Right" books, thinking about reading...etc) This mixture is important to help students begin to get excited about reading and letting them get their feet wet by allowing them to get their hands on the books they will be reading.

Following each mini-lesson, students would complete different activities in the work period that would help them practice the skill or behavior taught during the mini-lesson. For example, in the lesson about reading genres, we define reading genres, explore the major genres, and then go over behavioral expectations for working in groups (remember: a mix of reading instruction with behavioral expectations). In the work period students complete a book exploration in small groups identifying reading genres. We then come back together to discuss how it went- specifically how their behavior was.
You see, I always gave easy reading tasks to do at the beginning of the year because I want them to be able to focus on the expectations and routines rather than the task itself. Once they've got the behavior down, then I can challenge their mind :) Go for the quick win!
You might recall from a previous post in this summer series on planning routines and procedures, that I like to use a "Looks Like/Sounds Like" T-chart when introducing my expectations for different activities. I use the same "Looks Like/Sounds Like" format in my readers workshop as well.
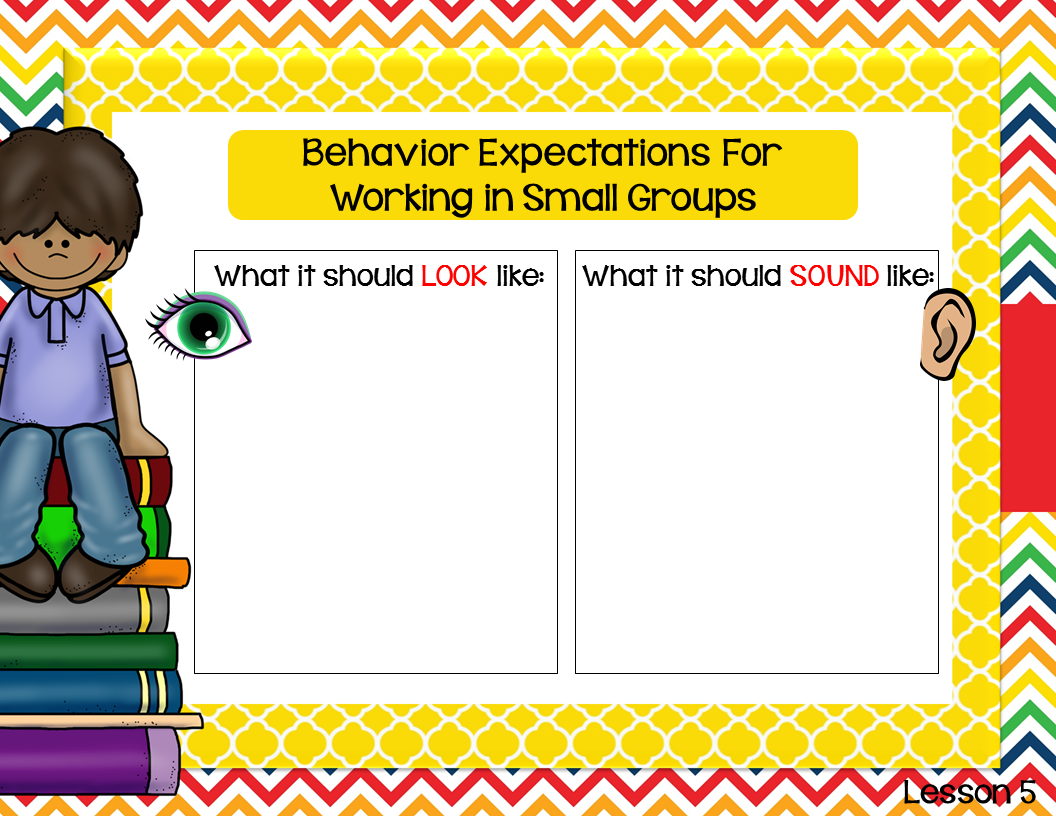
Here's what my PowerPoint anchor slide looks like to help teach expectations for working in small groups (see right):
Since you most likely haven't placed your students in reading groups yet (until you do some reading assessments and observations), you won't be able to conduct any guided reading groups during those first few weeks. So, instead, the work period is spent doing other activities that get them acquainted with the ins and outs of readers workshop.
The same holds true for centers. I suggest holding off on doing centers until you've covered the basic routines and procedures of readers workshop. Then, after the first few weeks or so, you'll slowly introduce the different centers. Many teachers do this by introducing one center at at time, using the mini-lesson to go over expectations and details about the center, and then using the work period to have all students practice the same center in small groups. This allows you to monitor and assist each group as needed. You can use the closing period to go over how students performed during their center time, and clear up any common issues that arose during the work period.
Establishing and Using a Reader's Notebook
You will also notice in my schedule above that we spend a whole day learning how to use our reader's notebook. I do this very early on because my students will use this notebook all year long and as I launch the workshop, I want them to get lots of practice using it so that they become proficient to use it on their own.
Their notebook is divided into 4 sections using page dividers or page protectors:
Reading Goals & Progress
Reading Records
Reading Responses
Reading Resources
On the second day of launching readers workshop, I hand out and go over all the materials that students will be placing in their readers notebook. We practice filling out the different sheets together as a class such as the daily reading log using a book that we read during a mini-lesson. As the unit on launching readers workshop continues, I continue to model how to use different pages such as their reading responses sheets. There are certain sheets that belonged in each section that students will use all year (like their list of reading goals), while others (like their daily reading log and reading response sheets) will be filled up and replaced as needed. The notebook components could be kept in 3-ring binder or 3 prong folder (although a folder is more limiting on space) and students used it all year.

For example, in the "Reading Goals & Progress" section, students would develop and track monthly reading goals, with the assistance of the teacher. We had a whole mini-lesson on different types of reading goals, how to pick one, how to develop a plan for them, and how to reflect on them.
The notebook was their go-to material that housed reading responses, notes from our individual conferences, their daily reading log, progress charts and graphs, and any other important hand-outs or reference guides that I wanted them to have access to all year long.
And, as you might guess, during the mini-lesson on this day, we talked all about the routines and procedures for where our notebooks are stored, how to treat the noteboo,k and so on.
You may also like to read:
In addition to introducing behavioral expectations, routines, and procedures, I also used the first few weeks to introduce students to some important reading topics. We would dive into these reading topics more throughout the year in our mini-lessons as well as in guided reading groups, however, I wanted to give my students just a taste of what was to come.
You'll notice that the last two weeks of my launch, we focused on word-attack skills and reading comprehension strategies. I by no means expected my students to master these skills and strategies during this time, however, by introducing them right off the bat allowed me to see a baseline of what skills and strategies my students were coming in to the school year knowing - and not knowing.
Since I wasn't meeting with guided reading groups during this initial launch period, I spent a lot of time during the work period writing down observations of students practicing these skills. I could then use my observations (and any other reading assessments that I conducted) to help me group students based on their individual needs. For example, I might have a group of students that need to work on fluency, and another group that might need practice on a specific reading comprehension strategy. Of course as I got to know my students better, my grouping became more refined. It's important to keep the grouping of your students flexible as their needs changed and their reading developed.
An Overview of Readers Workshop in My Classroom:
Phew - let's take a deep breath. That was a LOT of info about launching readers workshop. So, if you need to go grab a glass or water, go for it. I'll be here waiting! :)
With everything that I've talked about so far, I must admit that my workshop didn't always look like the above guidelines. Although my workshop always had all three parts as listed above, the time frames and activities varied, especially at the beginning of the year, as I already discussed.
I also decided that if I was going to use the workshop model, I was going to make it work for me and my students. I wasn't going to be confined to strict guidelines if it didn't meet the needs of the kids in my class. If you think about everything that you should do for your reading instruction (small groups, conferences, independent practice...etc.), its can be very difficult to juggle it all. So - here's what I did to get the job done:
Each morning when my students arrived, they would grab their reading bags and independently read at their seats or around the room.
Although this time wasn't a part of our readers workshop, I still had them begin reading because I never felt that they got enough time during readers workshop. After I completed my own morning routine (taking attendance, checking homework...etc..) I would conference with students as they were reading (stay turned for future posts all about conferencing in readers workshop!). I would typically put the names up on the SMARTBoard of students I was planning on conferencing with that morning so students knew what to expect. I also kept my own conferencing schedule to make sure I was meeting with each student regularly.
Monday-Thursday
I usually followed the workshop guidelines I listed above, dividing out my readers workshop block into the three sections.
The mini-lesson was used to model a reading skill or strategy in a whole group setting. The work period usually consisted of me meeting with 2 guided reading groups (about 20 minutes each). While I was meeting with groups (more about that in a second...), other students were working on other reading tasks, reading with partners, or independently reading again. I used a pocket chart system to let students know what they would be doing during the work period, whether they would be meeting with me or doing other reading activities. (see video further below).

In my guided reading groups, we would practice reading skills and strategies using a text at the group's reading level. I also used this time to address specific needs of the students in that group based on my observations of them as readers.
My instruction during this time was inspired by the book Constructing Meaning (affiliate link) by Nancy Boyles. This book was transforming in how I taught reading, especially in a small-group setting. I strongly recommend it to anyone who feels overwhelmed by guided reading groups, or teaching reading in general. In a nutshell, the book focused on how to teach reading comprehension strategies in kid-friendly language.
I'm tellin' you - this book was amazing in helping me teach reading right! If you need a little visual for how this all fit together, check out the video below:
On Fridays we did centers.
Now, here's the thing. I TRIED to do centers all week long and have students working on centers while I was meeting with guided reading groups but here's why it didn't work for me:
It got too noisy. Even if the students were on task, with 20 students "quietly" working at centers, it got very distracting for my guided reading students.
If readers workshop got interrupted for whatever reason (hello 3rd fire drill of the day), students would miss a center and I was left playing catch-up.
Trying to teach my mini-lesson AND go over the centers for the week was time consuming and cut into our work period.
It made my head spin. Too much going on at once. And I knew that if *I* felt that way, many of my students would feel that way.
Instead, on Fridays everyone did centers. My mini lesson consisted of going over the centers, rules, directions, expectations..etc... During the work period they would rotate between 4-5 centers. I could assist, monitor, and help out when needed - usually more assistance at the beginning of the year. I worked with very high needs students (academically and behaviorally), so my students benefited from the extra attention during this center time. It also helped to keep my sanity. #truthbetold
So - there you have it: my readers workshop from top to bottom. It's a lot. I know. And if I'm being completely honest with you, it looks a lot better written down that it looked in real life (at least at first). Having a smooth readers workshop takes a LOT of practice - for both you AND your students. It's a lot to juggle and figure out. And, as I mentioned, you have to find a structure and routine that works for you. That's why I like the workshop model because there is a lot of wiggle room to tweak it to your liking.
If you are like me, it really helps to have resources that lay it all out for you. For me - it was Nancy Boyles’ book: Constructing Meaning that finally taught me how to teach reading effectively. And with everything that I've learned through that text and with a LOT of trial and error, I have put together a comprehensive unit, Getting Started in Readers Workshop to walk you through, step by step how to get your readers workshop up and running. It comes with everything you need:
CCSS-aligned teacher lesson plans
materials for your students' reading notebooks and activity sheets
teacher guides and video tutorials
observations sheets
small group teaching forms
PowerPoint anchor slides
bulletin board set
...so much more.
You can find all the details for the unit by clicking the image below:
