Getting Ready to Teach: Force and Motion
I know from my own experience and in my conversations with other teachers that it is often a struggle to fit in science and social studies into your day.
The demands that teaching math and ELA have put on teachers leave very little time (both in your planning & prepping as well as in your instructional time) to develop engaging activities for the content areas.
All this means is that when you DO get to fit in science or social studies, you better make it count. By that, I mean, your lesson better be top notch in order to get the biggest bang for you buck!
If you're feeling like you just never have time to plan stellar lessons for the content areas, then this post is for you!
I want to share with you some fun and engaging ways to teach force and motion in your classroom.
Feel free to steal an idea or two!
IDENTIFYING PUSH vs. PULL:
So much of the concepts taught in force and motion come back to the idea of applying a push or a pull (aka - the force) to create a motion. This seems like a simple concept, but for students, thinking about pushing and pulling in this context can be confusing. It's important that students can tell the difference and identify whether a motion is being caused by a push or a pull.
That's why I like to do a very basic, yet very important activity that has students identify whether a force is a push or a pull. We do this by looking at several different pictures. Students look at the picture and decide what the cause of motion is (the force) and the effect of that force (the motion).

We used a simple cause/effect chart to do this (like the anchor chart above from my force and motion unit). It's important to note that some motions are caused by a push AND a pull, such as vacuuming or playing with a yoyo.

Setting this foundation will help students understand more complex concepts later in the unit.
STUDY JAMS VIDEO COLLECTION:
Have you heard of Study Jams? I love using this FREE tool to teach complex (and often otherwise boring) math and science topics. And - you're in luck! They have a whole collection of videos for teaching force and motion concepts!
My favorites are the three different videos for teaching the laws of motion. The animated videos do an awesome job of explaining the laws with real world examples. Check them out here:

Newton's Third Law: Action & Reaction
The videos are short enough that you can have them watch them once without stopping and then a second or third time to take notes.
PUTTING NEWTON'S LAWS TO THE TEST:
Newton's Laws of Motion are difficult concepts to learn (AND teach!). Even as an adult putting together lessons for teaching these laws of motion, I had to keep going back to the definitions to make sure I had it right. I knew that if I was feeling that way, my students were most definitely feeling confused as well. I knew that I needed to give my students some hands-on practice for each law of motion.
So here's what I came up with:
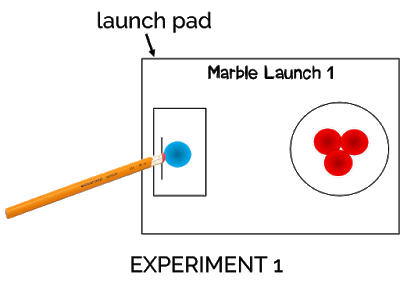
We tested each law of motion by performing three marble experiments.In the first experiment, students tested the first law of motion, inertia, which states that objects need force in order to move or stop. Using a marble launching pad (see right) students launched one marble into the center of their launching pad, aiming at 3 other marbles. In doing so, students could easily see that the marbles in the center of the launching pad only moved when the launching marble hit the 3 center marbles.

In the second experiment, students tested the second law of motion, acceleration, which states that forces can slow down, speed up, or change the direction of an object. This time, students placed a ruler at the end of the launching pad, opposite of the launching marble. When students aimed the launching marble toward the center marbles, they could see how the 3 marbles sped up toward the ruler (a new force in the experiment) and, once colliding with the ruler, changed direction.

Finally, in the third experiment, students saw the applications of the third law, action and reaction, that states if one force acts on an object, an opposite force will push back. In this final launch, students used a second launching pad where students aimed two marbles at each other. Here they could see how the marbles reacted to each other when they collided.
These three experiments are simple, but effective in helping students apply each law of motion in a fun way. (Students can never say no to launching marbles, right?)
TEACHING GRAVITY & FICTION:
Teaching science is all about testing and experimenting. Letting students see science concepts in action helps them to fully understand them. And, when you can use simple objects that you most likely already have lying around your classroom or house, it makes it easy to give students these hands on experiments!
Help students to fully grasp the concept of gravity and fiction with just a few books, felt, rough sandpaper, and a toy car.
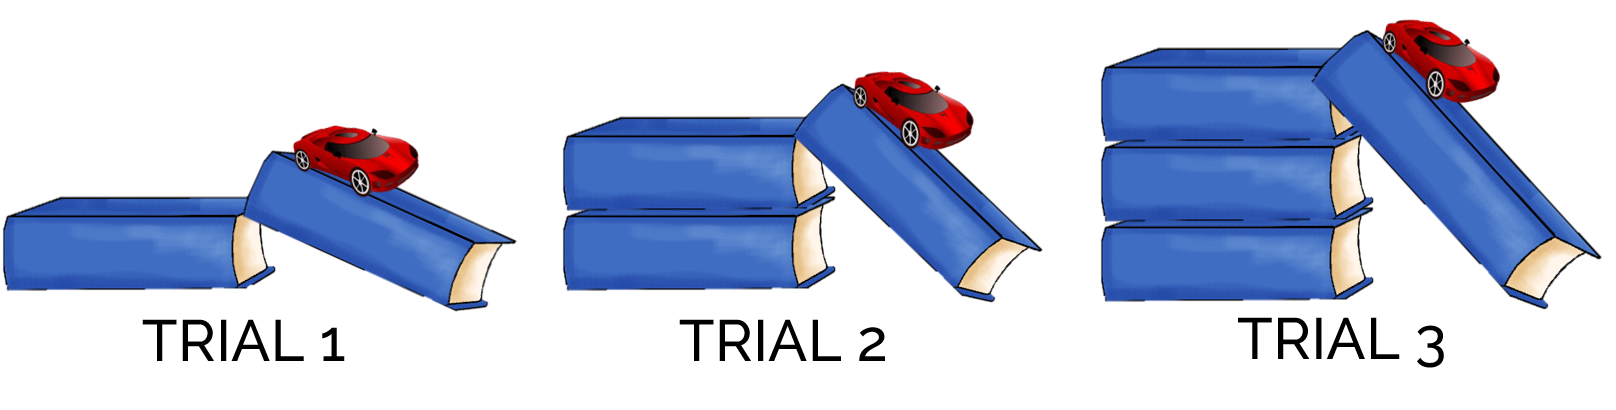
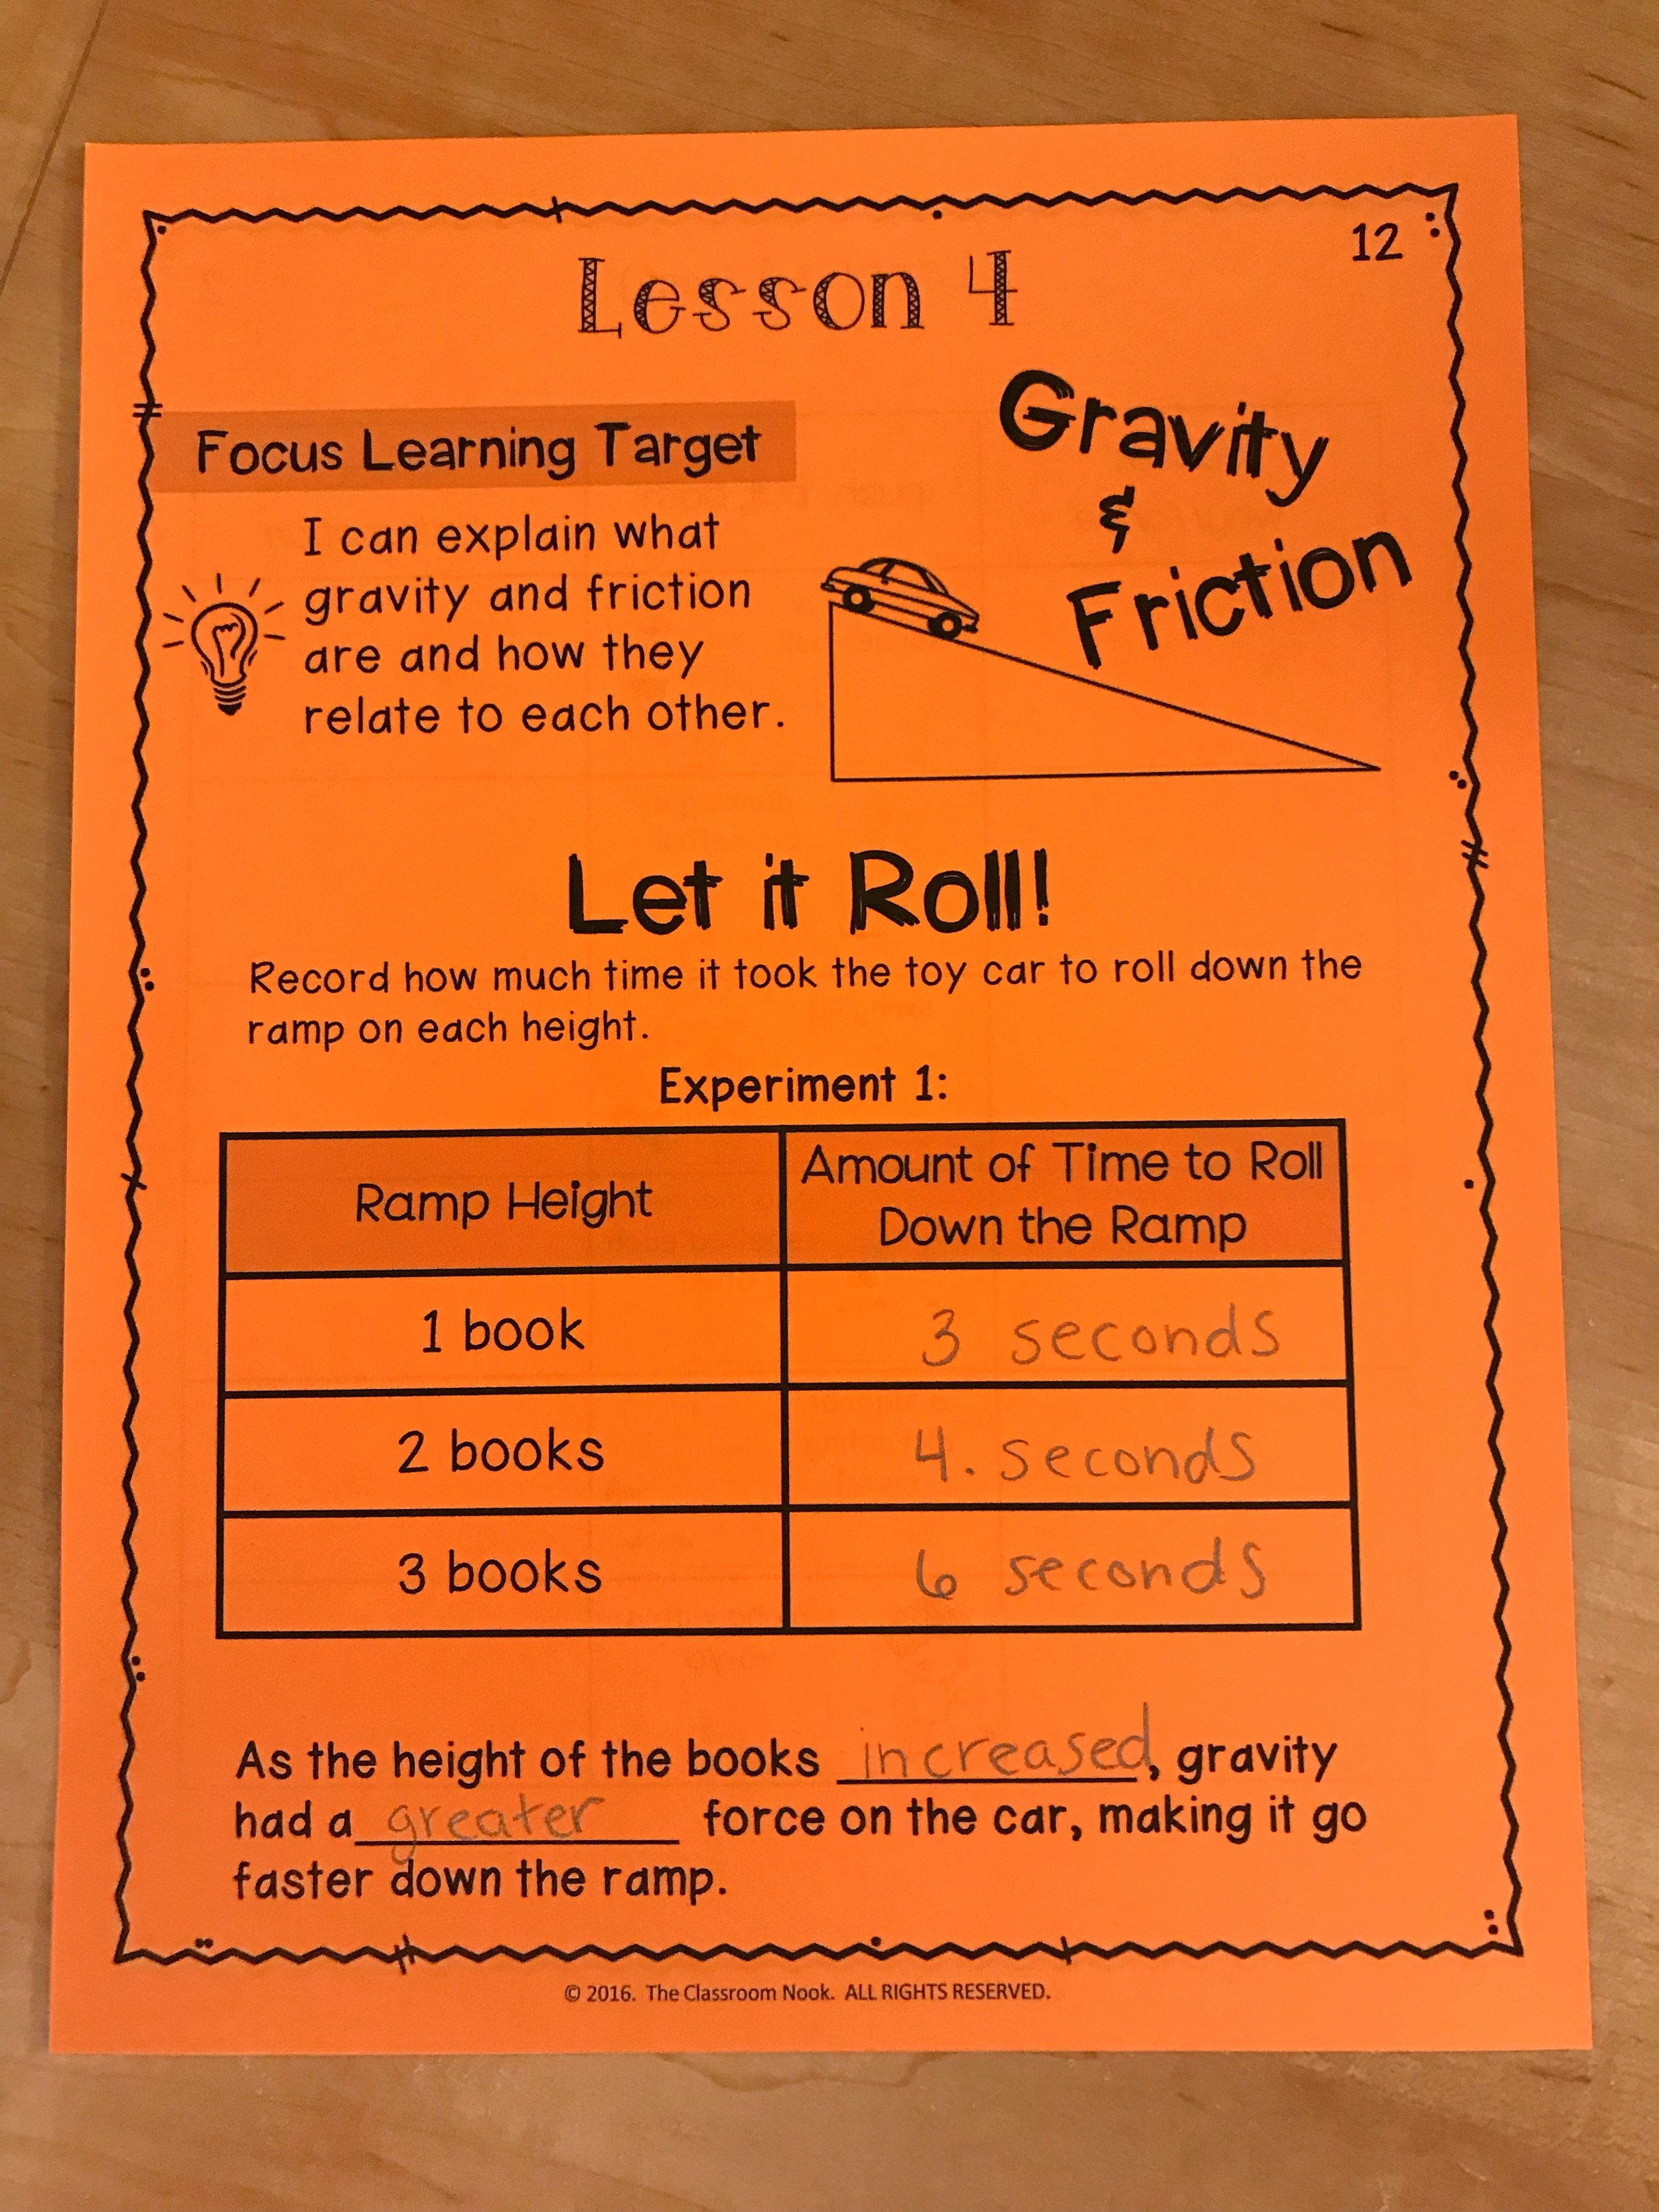
Students use these materials to test how both friction and gravity can effect how fast a toy car can go down a ramp. The experiments are simple. Begin by creating a ramp like shown (left). Students can test how changing the height of the ramp causes the toy car to go faster by timing how long it takes the car to get down the ramp. This illustrates that the pulling force of gravity grows stronger as the ramp gets steeper.

In a separate experiment, students keep the height of the ramp the same, but this time they test the speed of the toy car going over several different textures: the car riding over a smooth book, riding over a piece of sandpaper, and riding over a piece of felt. Just like the first experiment, students time how long it takes the car to reach the bottom of the ramp.
Students love this experiment and it makes it easy to see the effects of friction and gravity.
TEACHING POTENTIAL & KINETIC ENERGY:
In line with the other teaching ideas in this post, the last activity I'd like to share with you continues to support the idea that showing (and doing) is always better then just reading or hearing about a new concept.
When teaching potential and kinetic energy, students have a much better chance of understanding the difference if they can see it in action.
And, once again, giving real-world examples is simple! If you have a crayon and a piece of string, you're set to teach this concept.

To begin, tie one end of the string to a crayon (or similar object) and hold the other end up so that the crayon can hang below. Invite a student volunteer to come up and pull back on the crayon as if he/she is going to let it go and swing. Before the student lets it go, ask the class what the student could do to cause motion to the crayon (ans. let it go). Allow the student holding the crayon to let it go and swing back and forth. Have students observe what happens to the crayon over time. (It begins to slow down).
Experiment with letting the crayon go at several different heights (see A,B, & C in image above) and discuss how this change effects how long it takes for a crayon to come to a stop.
Use this experiment to discuss how increasing the height of the crayon increases its potential energy, and therefore, its kinetic energy. I also like to use a diagram (like below) to show the transfer of energy from potential to kinetic and back again.

Looking for some ready-to-go resources for teaching force and motion? Check out the resources below!