Ep 116 // Google Slides Tip: How to View Students Working on THEIR Digital Device from YOUR Digital Device

Inside This Week’s Episode: — Every teacher, at one time or another, has instructed students to work independently at their seats while he or she walks around the room monitoring students as they work. But - what if you could see how students were doing at THEIR seat - from YOUR seat using the power of Google Slides? This Google Slides hack is the tech tip you need to see your students working in real time on individual digital devices.
Monitoring Students Working Just got Easier!
I’ve got a super cool Google Slides tip to share with you today. I want to share how you can easily get a quick view of your students all working on THEIR own digital device from YOUR device.
Whether you’re an avid user of Google Slides or just use it here and there - you’re going to LOVE this tip.
And, here’s the cool thing - your students don’t even need to have a Google account. You don’t even need to be using Google Classroom in your classroom. The teacher only will simply need a Google account his/herself, and the ability to share a link with students.
Now - one thing you need to understand about Google Slides before you use this tip.
Google Slides is a live document. That means, when you share a Google Slides presentation with others, you will be able to see any and all changes that others are making on that document in real time. So if a student starts typing on a slide, anyone who has the link to that Google Slides presentation will ALSO be able to see this typing in real time on their own devices. This little detail is key and is what makes this sweet Google Slide hack possible!
Much of the time when you are sharing a Google Slides presentation with your students, you are giving each student their own copy. However, for this tip, you will all be working off the same document. You will need to give students the original link to a Google Slides presentation. (Stay with me here - this will all come together in a minute.)
This tip is helpful in a whole-class, or even a small-group instructional session. But first, let’s pretend we teach in a nondigital classroom. Let’s say you’re teaching a math lesson and you’re having students practice some math problems at their own desks on a piece of paper. After modeling for them how to solve a math problem, you have them try out one on their own while you walk around the room looking at individual student papers. It’s a familiar scene, and one I’m sure every teacher has experienced at some point.
Now - fast forward to the digital classroom - one where students have their own devices to work on. What was once practices with paper and pencil, can now be done digitally. And with digital learning activities, comes more convenience. And with this tip, instead of walking around the classroom as students work, you’ll be able to see your entire class, or small group, working on their digital device from your digital device.
Getting Set up: Using Google Slides to Monitor Student Work in Real Time
Here’s how it works. Ahead of time, you’ll need to prepare a Google Slides presentation. You’ll want to have a slide where there is something for students to do on that slide. Whether it’s some sort of drag and drop activity, maybe a matching activity — something that they have to do on a slide.
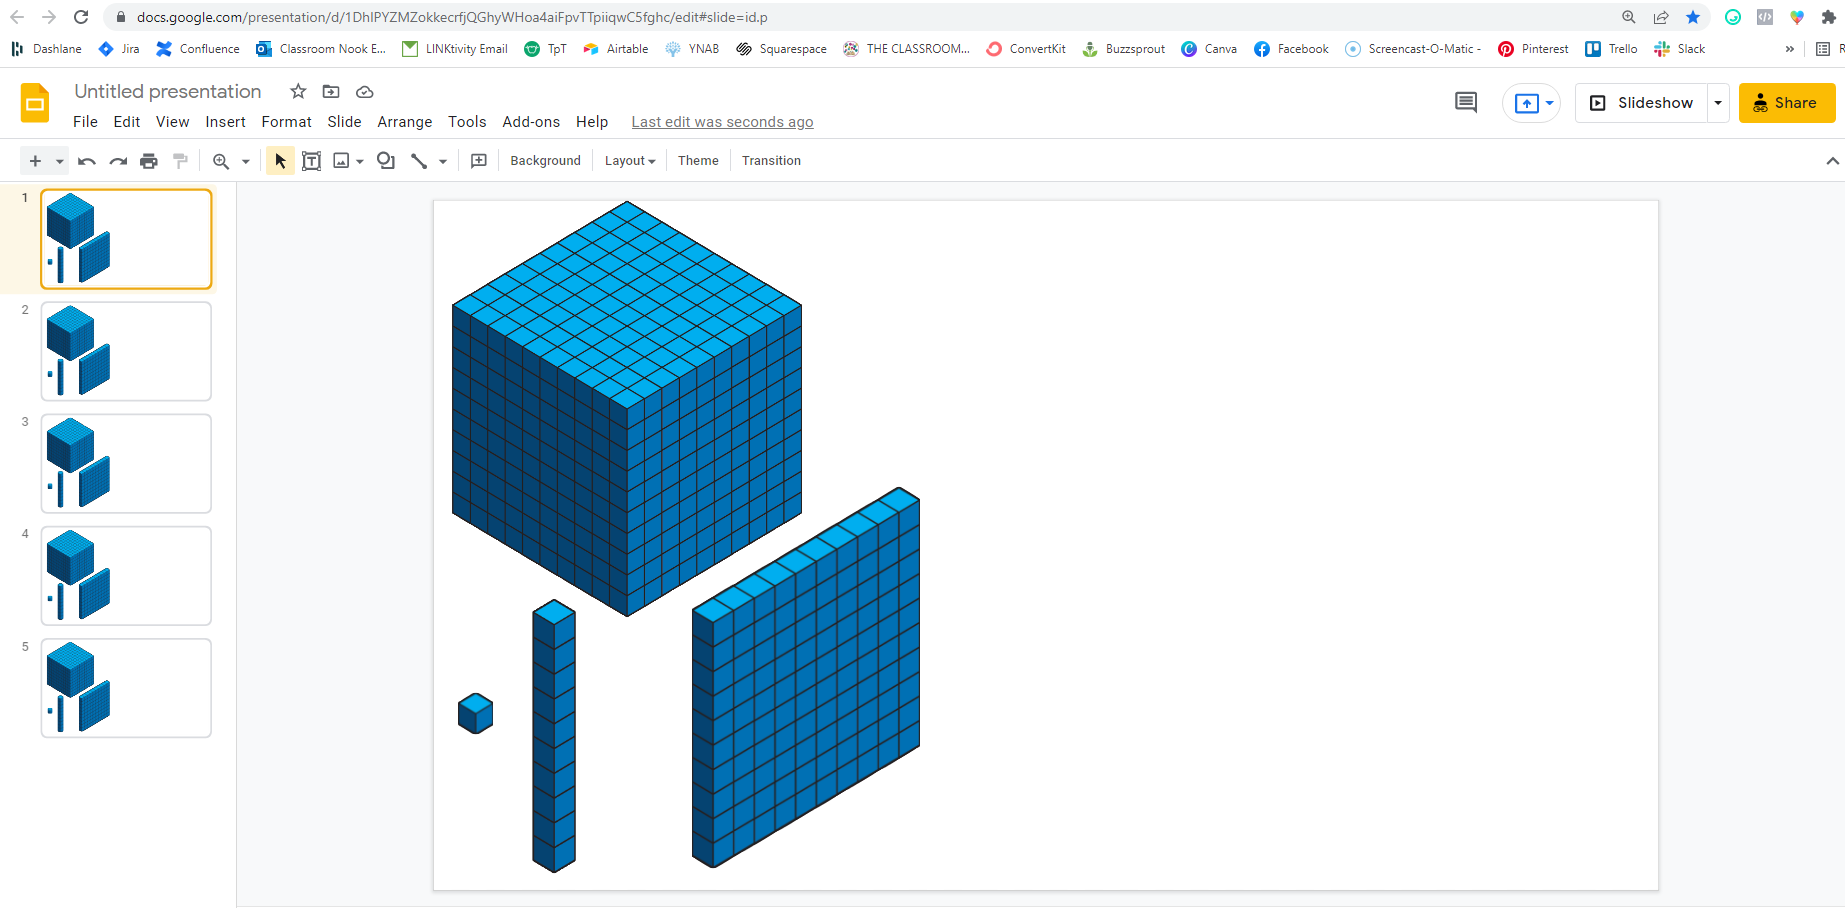
In my example, I’m going to pretend that I’m teaching a place value lesson using base-ten blocks. On my slide, I will insert some base-ten blocks clip art. I’ll insert images of several ones cubes, several images of tens rods, and several images of hundreds flats, and so on (see image). Essentially, I’m inserting moveable pieces on my slide - they are the digital versions of base ten blocks that students will be able to move around the screen.
What I want is for my students to be able to use these digital base ten blocks to practice what we are learning in the lesson. So, the next step, is to duplicate the slide that I’ve prepared for each student in my class. So, If I’m working with 5 students, I duplicate my prepared slide 5 times, If I’m working with my whole class, I duplicate a slide, one per student.
Then, I’ll assign each student a slide number. Tip: Once you duplicate the slide for each student, type their name on the slide so that you can see who is working on which slide (you’ll need this for later).
Here’s the fun part. After you’ve prepared your Google Slides presentation and assigned each student a slide, you’re going to do a couple of things. First, You’ll need to share the Google Slides link with your students. This can be done a couple ways. One way is to assign the link in Google Classroom if that’s what you’re using (you can even share a Google Slides like in other learning platforms). Note: Be sure that you’ve set the share settings to be editable by anyone with the link.
If you don’t use a learning platform, you could also easily create a QR code for the link to be printed out for students, or even display it largely on your smartboard that students can scan with their devices.
Once students have pulled up the Google Slides presentation up on their individual devices, instruct them to click on the slide that has their name on it. Remember - all the slides are the same, but each student will be assigned their own slide to work on. Then, instruct students to hide the other slide thumbnails on the left-hand slide so that they aren’t distracted by the other students working. Just locate the small little arrow at the bottom left-hand slide by the thumbnails to hide them.
Using This Google Slides Tip with Students
Now, back to our place value example. Let’s say you’re having students practice building numbers using their digital base ten blocks. You ask them to build the number 345 with their digital base ten blocks. Students can tab and drag, or click and drag their moveable pieces to create 345 with their base-ten blocks on their slide.

Now for the exciting part. You can easily see each student working, in real time on their individual slide, but from YOUR device. Here’s what you do: You will need to pull up the same Google Slides presentation on your own device.
Look in the bottom left-hand corner, under all the thumbnails of each slide and you’ll see a grid icon. Click on that grid icon to display all your students’ slides in a grid format on your device. The slides will be large enough so that you can see what they are doing. If you want to look closer at one slide, just double click on it and it will enlarge it.

And that’s it! It’s so easy to take a quick scan on how all students are doing as they work individually. Because they are all working from the same live Google Slides presentation - you can see their work in real time! And - when you bring the class back together, if you’re working on a SMARTboard or larger white board, you can easily display student slides as you discuss what they were working on.
What other types of activities would work with a set-up like this?
Maybe students are all working on the same journal prompt as a responses to what you worked on together as a class. Assign each student a slide to start typing their response, and you can easily see at a quick glance what students are writing.
Maybe you’re having them do a sorting activity and you’ve prepared a slide with several words or pictures that you’re having them sort into columns.
Maybe you have some sort of word work activity — all of these are easy ways to use this Google Slides tip!
Want to see this tip in a video tutorial format? View the video below:

REVIEW & SUBSCRIBE TO THE CLASSROOM COMMUTE PODCAST
Don’t miss a single episode. Subscribe to the podcast and you’ll get notified each week when a new episode gets dropped! And - if you love what you hear, I’d be so honored if you took a quick moment to rate and review the podcast so that other awesome teachers can find the podcast!