Ep 66: Ditch the Textbook: this mp3 audio file was automatically transcribed by Sonix with the best speech-to-text algorithms. This transcript may contain errors.
Speaker1:
Hey, teachers, if you have a classroom and a commute, you're in the right place. I'm your host, Rachael, and I want to ride along with you each week on your ride into school. This podcast is the place for busy teachers who want actionable tips, simple strategies, and just want to enjoy their job more. Let's go.
Hey, guys, Rachael here. You are listening to The Classroom Commute, thank you so much for joining me today. I'm glad to have you and I'm kind of excited about this topic because I have always been a big fan of trying something new and trying to find the most engaging ways to teach something to my students. I'm just going to say it...Textbooks are not engaging. Now, that's not to say that they don't have their place in the classroom or that they're not a great tool for teachers. When it comes to teaching content to your students, if you want to be engaging, it's likely not going to include a textbook in your instruction.
I want to tell you a quick little story before we get started today. My first year of teaching, back in 2006, I was hired one week before school started. Now, in the district that I worked in, this was not uncommon. I worked in a city district and there was shifts all the time in the school systems, meaning teachers were often shifted from one school to another with little heads up. So I was the lucky teacher that got hired one week before school started because there was a shift and they needed somebody to fill that spot in the school that I was hired him. I was hired to teach fourth grade. I was assigned to this hot little classroom on the second floor of a very old building with no air conditioning, of course. I believe the building was built in 1912, and I'm pretty sure they hadn't done too much remodeling since then. To make matters worse, I was the lucky heir and I say that with complete sarcasm. I was the lucky heir to a classroom that was previously occupied by a teacher that was now basking in the glory of retirement. What did that mean? It meant that I got all the crap that the retired teacher didn't want to take home with them or couldn't pawn off to their coworkers. There I was, the teacher coming into a classroom from a teacher that just left the classroom with pretty much everything that he didn't want on the shelves of that classroom and there it sat all summer long collecting dust. Among the rubble, a class set of social studies textbooks from, wait for it, 1978. Please tell me those were not the current textbooks that the students were using, although I'm pretty sure they were. I mean, I get the fact that the American Revolution and the facts that we teach about the American Revolution have likely not changed since the late 1700s but come on, we need an updated textbook. Alas, there they were. Let me ask you, what's the copyright of your textbooks? Are they from the 20th century? Because that was over 20 years ago now. Hard to believe. Even if they are on the newer side, they're likely not something that your students get very excited about when you bust it out for a lesson on whatever it is that you're teaching.
Let me encourage you, there is a better way to using your textbook. Now, what I'm going to share with you today is not a quick fix. I will not come here and say that you'll be able to, in a matter of minutes, implement these new strategies in your classroom. I don't want to make any false claims that in 10 minutes or less you're going to have the solution to your textbook woes. What I am going to share with you is that with a little bit of work, you are going to have an amazing, more engaging textbook alternative that you'll be proud to present to your students. Once you put it together, you'll be able to use it year after year after year, and you will have your students begging to learn more. You, dear teacher, are a go getter so let's do this. I'm going to present you with four textbook alternatives.
Speaker1:
The first one is a gallery walk. I've talked about a gallery walk on the podcast before but let's dive into it now in case you missed the episodes where I've mentioned it. A gallery walk is a fabulous way to present new information to your students that allows them to move around and interact with objects, pictures, and each other while learning new content. If you're unfamiliar with a gallery walk, let me give you a quick overview. A gallery walk is when you set up several stations or sections around your classroom. At each of those sections you have pictures, artifacts, posters, and other objects about a specific topic. Each station is going to exhibit something different about that topic. You're going to take your big topic and break it into smaller topics. Each station is going to be one of those smaller topics. Students walk around from station to station collecting information on an activity sheet or a notebook or however you want them to collect information. They write it down or do some sort of recording from what they're learning at each station. At each station, there might also be a piece of chart paper near the pictures or the objects that the students are observing, they can jot down questions, thoughts or things that they notice about the content being presented. Think of it like a graffiti board at each station where students can jot down, draw, write, whatever it is that you want them to do at that station. Then as the time goes on, the graffiti poster that you've put there is going to get more and more elaborate as more students add things. I like to do that at each station. Now, I've done a gallery walk for a number of units that I have done with my students. One of those units was my animal unit. For example, at the beginning of our animal unit we talked about the difference between vertebrate and invertebrate animal groups. What I did was I created several posters, one for each animal group, I put each poster at a separate station. Along with the poster, I had picture cards with examples of animals found in each group. They would go to the sponges section when they were learning about invertebrates and they would see pictures of sponges, either pictures that I had printed out or pictures that I had kind of bookmarked inside of different books that we had. They would explore those things. I also had put a poster, on that poster it had the name of the group. It had the definition of that animal group for what classified an animal to be a part of that group. Then I had an "Are, Have, Can" chart so if you're not familiar with that, for example, it would say 'Sponges are'. Then I had a bulleted list of things that sponges are. Then I had 'Sponges have' and then different things that would be characterized as what sponges have and then 'Sponges can'. You've likely seen that chart before. I had one of those posters for each of the animal groups. What students would do is simply, they had their what I called their student field guide and they would walk around with their student field guide from section to section, station to station and record what they were learning about each animal group. We did one day for the invertebrates animal groups, and then we did one day for the vertebrates. If you have anywhere between three to five stations, it makes it nice because students can spread out and you don't have too many kids congregating in one particular station. Then, of course, there's going to be a little bit of structure around this where you give students five minutes at each station and then have everybody rotate at once. You don't have to do it that way. You could have it be a little bit more free flowing, depending on the types of stations, how many students, and of course, how well students typically do in these types of activities. You can plan it out.You can have them all rotate at the same time or let it be more free flowing and let them move through the gallery walk as they work through the stations on their own pace. Like I mentioned before, I would have a graffiti poster at each station and students would write down words like slimy or squishy. Sometimes they would make their words that they were writing bubble letters or they would make it look creative to represent that the word that they're writing. Students get really creative on these graffiti boards, it's kind of fun to have that there for them.
Now, a reverse activity for a gallery walk would be to have the students create the content that's going to be placed at each station as a review of what they learned. In a traditional gallery walk, you're providing the posters, pictures and articles or whatever it is that you want them to be looking at at each station. In this reversed format, you are going to assign a group of students or several students a particular sub portion of an entire topic, and they're responsible for creating the content that you taught. This is a great authentic end of unit project for students to work on. You might even have one student from each group stay at their station to answer any questions that other students have about that topic. I love this idea of a gallery walk. It can really take on a lot of different feels and looks depending on the content that you're teaching. It's a great way for students to explore new content if you're doing that traditional gallery walk or it's a great way to have students review content that they've learned by flipping the script, so to speak, and having them create the content for the gallery walk for the rest of their students to walk around and see.
Now, the second alternative to a textbook is something that I have mentioned multiple times on the podcast and on my blog over the years and that is readers theater. Have I mentioned how much I love readers theaters? Because I do. If you've ever used any of my resources, you've likely come across a reader's theater script that I've created to help teach students about potentially boring topics. Take pollination, for example. Reading about it in a textbook is a surefire way to lose your students interest faster than they lose pencils. The same content in the form of a reader's theater script where both characters are narrating the process of pollination in humorous dialogue. Well, now your students are listening, and better yet, they're going to remember things that they're learning in a reader's theater script. I can't think of a single topic that you can't change over into a simple reader's theater script. Here are some of the topics that I've created a reader's theater script for. I created a script called Live from Space, and this was a script about newscasters interviewing astronauts traveling to the sun. This was from my sun, earth and moon unit, where we were teaching about the sun. I turned it into a script, a whole lot more engaging than reading about it from the textbook. I created a script called No taxation without representation, of course, that was a script about the colonists discussing the growing tensions between England and the colonies in regards to British taxes from my American Revolution unit. I had a readers theater script called Two Separate Worlds, where the sailors on a cargo ship were discussing the differences between the north and the south during the Civil War era. I had a script called A New Home, a script about colonists arriving in North America. It's a Cycle was a script about big drop and little drop discussing the water cycle. Busy bees, like I mentioned, which was one about pollinators traveling through a garden, discussing pollination along the way. Then I used a script called How a Bear Lost its Tail for introducing the topic of animal inheritance from my Animals and Ecosystems Unit. There really is no limit on the types of topics that you can cover. Anything can be covered. I know that you might be thinking, 'Well, I'm not very creative writer. There's no way I can do this and that's where the textbook may be helpful. You can pull out the information that you need to teach and just put a character behind it, take out the content that you need, turn it into dialogue, and then take that dialogue and break it up and assign it to a character in your story. It's really not any more complicated than that. I will link to an article that I wrote over on the blog all about how to use readers theater in your classroom. You can check it out if you want to learn more about this. If you want some ready for you, already done reader theater scripts. I've got a small library over at Teachers Pay Teachers that I will link to in the show notes as well. You can grab any of those scripts that I mentioned if they would work in your classroom.
All right, the third way to replace textbooks in your classroom are what I call discovery learning folders. Now, I'm going to be honest with you, discovery learning folders are nothing more than a file folder with flair. I promise. These are easy to make and once you make them, you have them year after year to use over and over with your students. Here's how it's done. The first step is to choose a topic that your textbook covers, but does it in such a way that puts you and your students to sleep. I've chosen topics like Native American regions of North America, daily life of colonists, political decisions made during the Civil War, biomes, early explorers, major battles of the American Revolution and so on, just to name a few. I will link to all of those in the show notes. I break that larger topic down into subtopics and I create one discovery learning folder per subtopic. For example, for the political decisions of the Civil War, I had six different subtopics. The first one was the Missouri compromise and another one was the Dred Scott case. Then there was the Kansas Nebraska Act, the compromise of 1850, Harpers Ferry and a new president. Those were my six subtopics about the political decisions made during the Civil War. For my early explorers learning folder's, I had one folder that discussed the life of an explorer. I had another folder for discussing the reasons for exploration and a third folder for presenting contents on the countries that were involved in the age of exploration and so on. Students would then rotate through these folders similar to what they would do during a gallery walk, like I mentioned, and they would collect information in the notebook or on a recording sheet or whatever you have them do as they're learning about the different sub topics. Step one is to choose that big topic and then divide it into subtopics. Of course, having three to five to six topics helps to make it so that you don't have too many students working in one section at a time. The second step is to open up a blank PowerPoint presentation or a Google slides presentation, whatever you use to create student resources and create a cover page that you're going to put on the top of this file folder. Be creative. If you're not super duper creative, just grab some clipart. Include the title of that subtopic and print it out so that you can put it on the cover of that file folder. Step three is to create up to three pages of content. Again, this content can come directly from the textbook, but you're going to make it more interesting. You're going to include more clip or images that are going to grab the student's attention and you're going to break it up in a way that's a little bit more easy for students to digest. You can also make it more tailored to your students abilities. If the textbook is way over their heads, this is where you can take the content, but then translate it for students in a way that's going to make more sense to them. Now, I say up to three pages of content. Again, if you're in PowerPoint, you're going to do one slide and that is going to be one page. The second slide is a second page and third is so on. The reason I say three is because you can glue one page on the inside cover, another page on the other side of the inside cover, and then one page on the back. You don't want to go crazy with too much information. You don't want it to be overwhelming. You just want to include the most important pieces of information that your students need to know as it relates to this subtopic. Be sure to include lots of pictures, maps, and diagrams or whatever visual that you think will help your students best understand the concept. On that third page that I glue in on the back, I like to come up with some discussion prompts that students can talk about or reflect upon in their groups. I put these on the last page so that they have gone through the information first and then they have those topics or those discussion questions to discuss as a group. You've got step one, choose your main topic and break that topic down into subtopics one topic per folder. Step two is to create a cover image using PowerPoint or Google slides or whatever it is that you use and glue that cover image on the front of the file folder. Step three is to create three informational pages that you can glue on the inside flaps of the file folder and one on the back. You can also include some discussion questions as well. Step four is optional, but highly recommended, and this is to include an extension activity for students to complete after they've gone through the information of the folder. This could include a word sort, a coloring page, or labeling a map or a diagram. It could include completing a page for an interactive journal. When I did this for my explorers discovery learning folders in the folder all about the life of an explorer, I had them complete a diagram for the parts of a ship and it was really simple. There was just a mat with the picture of a ship on it with different labels pointing to different sections of the ship, they'd read different cards and place it in the right spot. These extension activities should be short because you don't want to take a super long time. It's just a quick way to reflect on something that they've learned in that particular folder. Again, it's optional, but it's a great way to make it even more interactive right there at the learning station. The last thing that you need to do, and I've kind of already mentioned this throughout, is you just need to glue your cover pages and your informational pages into a file folder. It's very easy and you can laminate your file folders and use these year after year. That's why I said it does take a little work up front but once you do it, you can use it year after year. These are great ways to replace a textbook. It's a great way to get your students working in small groups, talking, discussing, and maybe potentially creating a little extension activity to go along with it. I do have some discovery learning folders already created. I've got several, like I've mentioned, the explorers. I have one for the Civil War, American Revolution, and Biomes and a few others. I will link to those in the show notes if you want some all ready and done for you discovery learning folders and save yourself a little bit of time. This is an activity that you can easily do yourself with whatever content it is that you need to cover with your students.
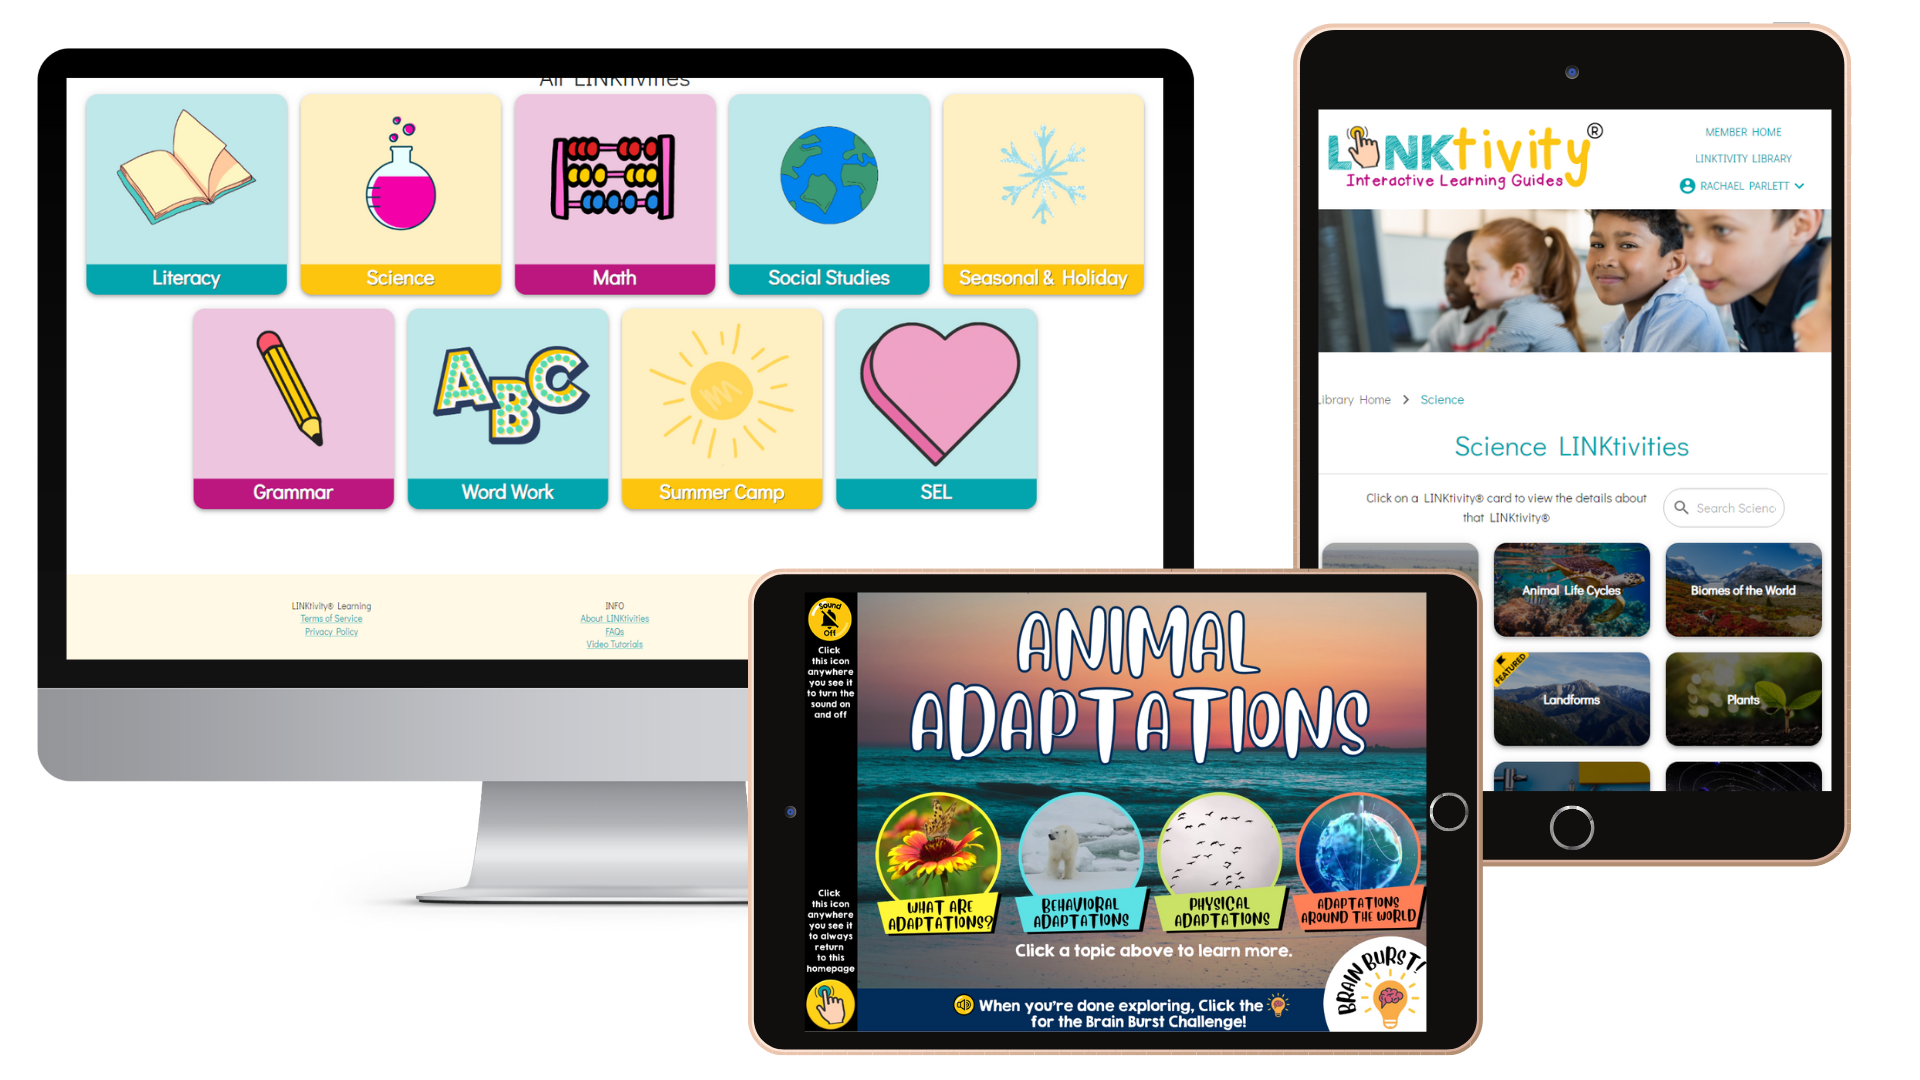
All right. I have saved the best for last. I may be a little partial to this because I love creating them. I'll give you a very quick second to think about what I'm about to say. Did you think about LINKtivities? Of course you did, because I can't stop thinking and talking about LINKtivities, they are without a doubt my favorite way to replace a textbook with a more engaging activity. Lucky for you, I have a huge growing library of activities on all sorts of topics that you can take and plug right into your classroom and use right away. If you do not know what LINKtivities are, you're likely new to the podcast and that's okay, I will link to a resource in the show notes to explain them in depth for you. If you have been on the podcast for even a little bit, you know what my LINKtivities are. They are interactive digital learning guides where students can control the pace. They can go about the LINKtivities in their own order that they want to go into, and they can explore videos and images and all sorts of things that help teach a topic. The best part about these is I've already done the work for you. I've already put these LINKtivities together and I've included a flipbook or a recording sheet that students can use to complete as they go through the LINKtivities. The work is done for you for this particular textbook alternative. They're ready to go. I will link to my collection of LINKtivity digital learning guides in the show notes over at classroomnook.com/podcast/66. I have science ones and social studies ones and ones for reading and a whole bunch of others so make sure you check those out if you want an easy way to instantly grab your students attention. If you are like a lot of other teachers, I hear that once you begin using them, your students are going to crave them. There so easy right now because a lot of us are doing digital learning in some sort of fashion. These are easy because all it takes is a link and an Internet browser to get these LINKtivities up and running in your classroom. They have audio support, so they are just a gem in the classroom. If you know me, I have put my heart and soul into these LINKtivities in the past year or so, so hopefully you can tell how passionate and excited I am about this. Again, I will link to them in the show notes.
I have given you four textbook alternatives, so there is no excuse to not try out something way more interactive and engaging with your students. The textbook has its place, I get that but at the same time, we want to give our students the best that we can give them. You can do that by making some simple tweaks. It does take a little time up front, but in the end, your students are going to benefit so much more. Let's run through them one more time. The first one is a gallery walk. Whether it's you creating the content for each station that the students are going to walk through in the gallery walk or flip the script a bit and have students create the content as an end of unit project for them to present the information that they've learned. The second alternative is that readers theater, whether you grab one of mine that I'll link to over at the show notes or you create your own using the topics and the content that you need to teach your students, it's a great way to make learning new content interactive. The third way is the discovery learning folder's. Again, I have a library of them, I'll link to them, but you can easily make them your own. All you need is a file folder and PowerPoint or Google slides and a printer to get these up and running. Then the fourth and final way, and might I argue the most interactive and fun way, are LINKtivity interactive learning guides. I will link to a lot of the resources that I've mentioned over in the show notes. Again, you can get there by heading to classroomnook.com/podcast/66.
If you have a moment after all of that, please leave a review of this podcast. It's how other teachers find us over here and it just lets the podcast apps like iTunes and Google podcasts and so on know that there is value in this podcast. If you have found value, I would love if you left a little review.
All right, that is all I have for you today. I hope you have a wonderful rest of your week and I will be back again next week. Same time, same place. Bye for now.
Sonix has many features that you'd love including transcribe multiple languages, automated subtitles, automated translation, advanced search, and easily transcribe your Zoom meetings. Try Sonix for free today.