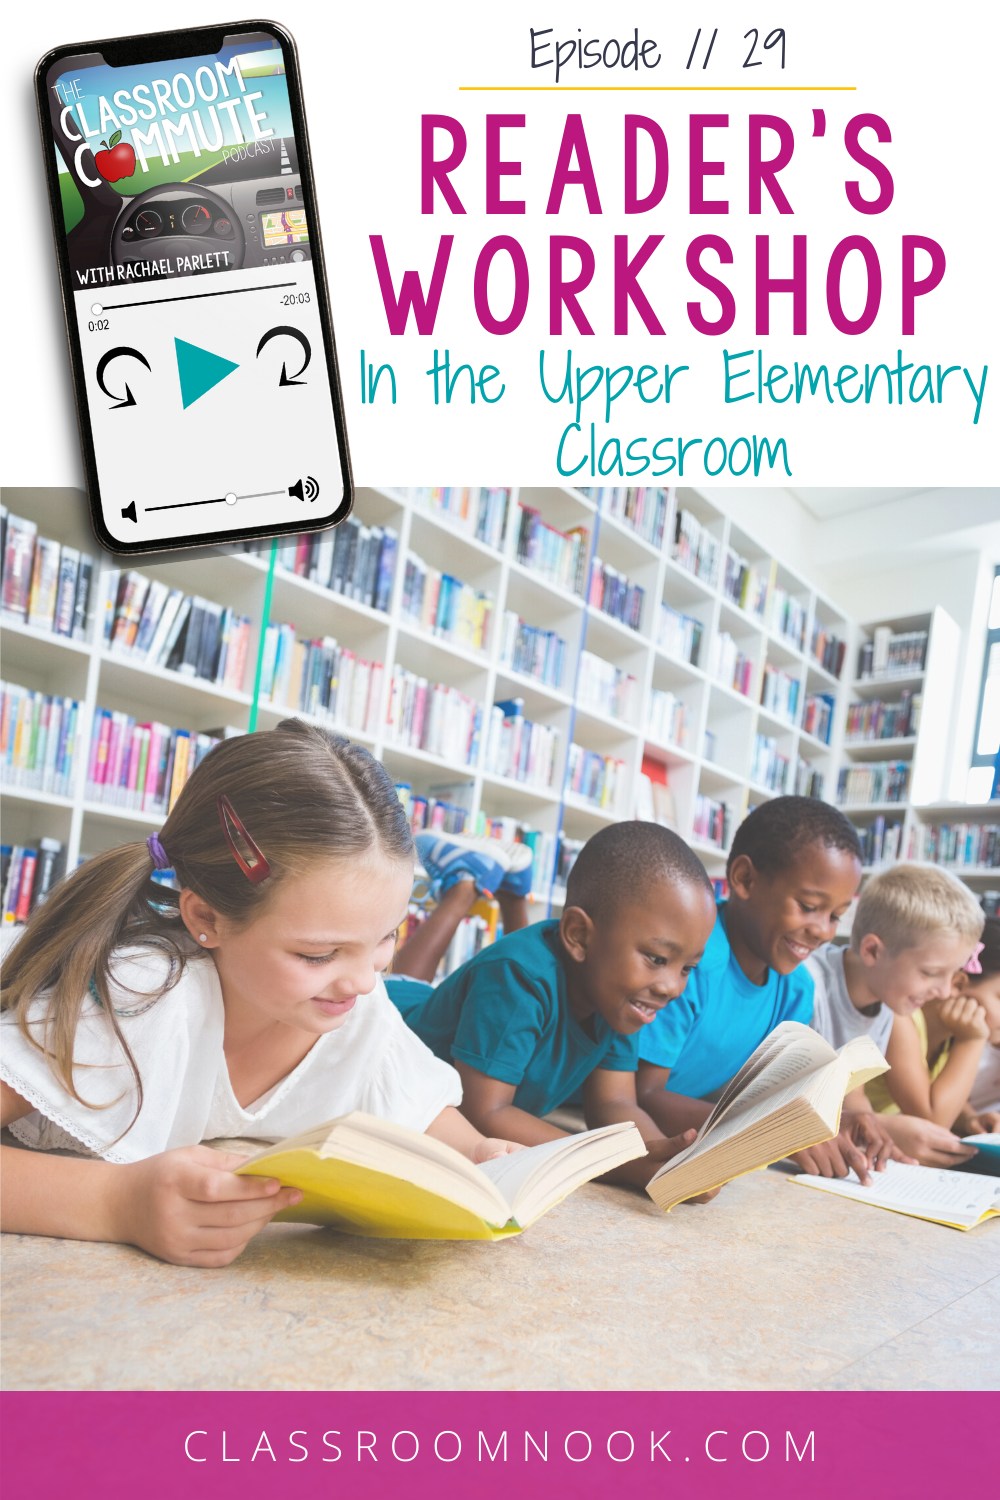
CCP: Episode 29 // How to Launch Reader's Workshop in Your Classroom
Your first month of reader’s workshop just might be the most important month of reader’s workshop all year long.
A success reader’s workshop begins with laying the ground work. Getting your workshop up and running takes a lot of moving parts and it’s worth taking your time getting those parts to move smoothly before you go full-steam ahead.
In this week’s episode, learn how to intentionally and thoughtfully launch reader's workshop in your upper elementary classroom. I’ll walk you through the MOST important things to focus on during the first month of school. You'll learn what you need for a successful reader's workshop and some of the best tips and resources to make it happen!
Highlights from the Episode:
If you walked into my classroom… (1:31)
The three main components of the workshop model (2:18)
Mini-lesson
Work Period
Closing
The mini-lesson broken down (3:21)
The work period broken down (4:24)
The closing broken down (5:52)
Preparing your room for reader’s workshop (7:34)
Where will your classroom library be?
Where will students be allowed to read?
Where will reading materials be kept?
How will you organize your classroom library books?
How will students check books in and out of your classroom library?
Where will you meet with small groups?
How your workshop might look at the beginning of the school year (11:26)
Mini-lesson topics to include in the first month of reader’s workshop (13:30)
What you students should be doing the work-period in the first month of reader’s workshop (15:24)
Using a Reader’s Notebook during reader’s workshop (18:31)
An closer look at reader’s workshop in my own classroom (21:03)
Links & Resources Mentioned in the Episode:
Grab the FREE Teacher’s Guide to Reader’s Workshop
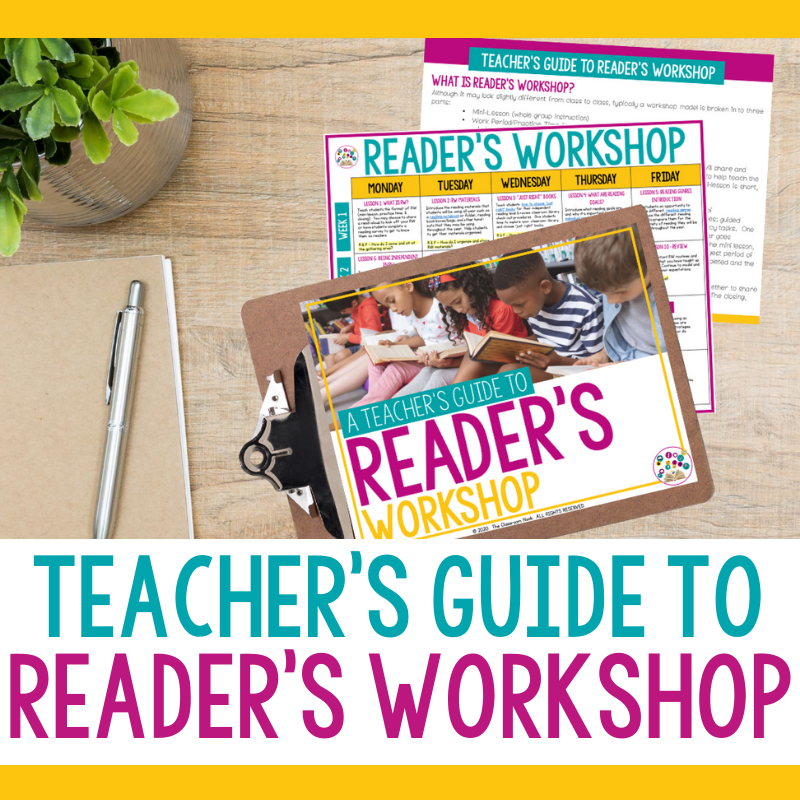
free guide to reader’s workshop
Reader's Workshop has a LOT of moving parts! This guide will help you make sure all those parts work together and run smoothly...right from the beginning!
You'll even find a 20-Day calendar of lessons to complete during the first few weeks of using the workshop model!
Creating a Diverse Classroom Library
Classroom library book management tools:
IntelliScanner (affiliate link)
smart phone apps like iBookshelf, Book Crawler, and Book Buddy
Episode 27: Developing a Strong Classroom Management System
How to Use a Reader’s Notebook
Video Tutorial: Creating a Reader’s Workshop Schedule
Getting Started in Reader’s Workshop Unit
Distance Learning Podcast Episodes:
Episode 15: Distance Learning Made Simple
Episode 16: 5 Things to KEEP Doing During Distance Learning
Episode 17: 10 Virtual Activities to Do Over Google Meet or Zoom
REVIEW & SUBSCRIBE TO THE CLASSROOM COMMUTE PODCAST
Don’t miss a single episode. Subscribe to the podcast and you’ll get notified each week when a new episode gets dropped! And - if you love what you hear, I’d be so honored if you took a quick moment to rate and review the podcast so that other awesome teachers can find the podcast!
Transcript
Ep 29 How to Launch Reader's Workshop in the Upper Elementary Classroom transcript powered by Sonix—easily convert your audio to text with Sonix.
Ep 29 How to Launch Reader's Workshop in the Upper Elementary Classroom was automatically transcribed by Sonix with the latest audio-to-text algorithms. This transcript may contain errors. Sonix is the best audio automated transcription service in 2020. Our automated transcription algorithms works with many of the popular audio file formats.
Hey, teachers, if you have a classroom and a commute, you're in the right place. I'm your host, Rachael, and I want to ride along with you each week on your ride into school. This podcast is the place for busy teachers who want actionable tips, simple strategies, and just want to enjoy their job more. Let's go.
Well, hey there. My name is Rachael, I am the host of The Classroom Commute Podcast. Thank you so much for joining me today. I am really excited about this episode, it's going to be a good one! If you've been with me for a while you might have guessed that I really like my processes. I like my step by step game plan. And I like to make sure that I've crossed my T's and dotted my I's when it comes to planning for something in the classroom. Readers Workshop is no different. I had a system in place that I would follow from day one at the beginning of the school year. I want to share that with you today because I think a lot of teachers are very intimidated by Readers Workshop. They don't know how to get started, they don't know how to implement what they need to teach into Readers Workshop. Today, I hope I can give you a foundation for how to launch Readers Workshop successfully in your classroom.
If you walked into my classroom, most mornings you would most likely find the following scene. Let me paint you a picture. I would typically be working with a group of small students at the guided reading table. A few students would be dispersed throughout the room in beanbag chairs, carpet squares, or even just laying on the floor independently reading. A few other students would be making reading responses or doing activities at their desks in their readers notebook, while others might be partner reading. Oh, and let's be honest, there was usually 'that kid' pulling off the labels on his crayons and not doing what he was supposed to be doing but that's just if we're being honest. This scene would vary from day to day depending on what we were learning, but it usually followed a certain format, a workshop format, to be specific.
Now, just to make sure that we are all on the same page I want to just take a quick moment to define what the workshop model is in case it's something new to you or in case it may have looked different in your classroom. I want to make sure that when I say 'workshop', you know exactly what I'm referring to. Although it may look slightly different from class to class, typically, a workshop model is broken up into three parts. And these are the titles that I've given these parts, you may call them something different. The first part of a workshop model is the mini lesson, this is the whole group instruction where all students are gathered around at your gathering area and you're teaching a skill. We're going to talk more in-depth about each part in just a minute. The second part is the work period, this is the small group instruction as well as independent practice as students are working around the room. And then the workshop model would finish out with the closing portion, again, that's whole group instruction where you bring the class back together again. So let's just break this down a little bit more and give you a little more detail about what each portion included.
In the mini lesson, students were generally, like I mentioned, gathered in the central area where the teacher, you, will be teaching, sharing, and modeling a reading strategy or skill. This skill or strategy comes from your district or your individual school curriculum. It's important to note here that if you use a workshop model in your classroom, the workshop model itself does not include a specific curriculum. Whatever curriculum you need to use can fit right into the workshop model. So in this mini lesson, you're teaching and modeling a reading skill or strategy that follows your curriculum. The teacher will often use anchor texts read alouds to help reinforce the strategy and invite students to share things that they notice about the book as it relates to the strategy or skill that you're teaching. The important thing to remember here is that the mini lesson is short. We're talking about 10 minutes so you need to get right to the point, get right to the modeling and keep it short so that you can send students on their way because you want the bulk of your workshop to be during the work period, the second portion of it. This comes right after the mini lesson and it can be used in a variety of ways. Some teachers use it for students to work on reading centers, while other teachers will use it for independent reading time, partner reading, or guided reading time as well. Or it could be a combination of all the things that I just mentioned.
One of the benefits of Readers Workshop is the flexibility it provides to change it up as the year goes on. So during one portion, when you're teaching one specific skill or strategy, it may make more sense for students to work in centers. Other times it may make more sense for them to work more in independently reading and practicing the skill or strategy on their own in their own individual books. So it really could be switched up throughout the year. The idea, though, is that the work period is that time for students to practice the skills and strategies taught in whatever format that makes sense for that skill and strategy. This is going to be the longest period of your workshop. It can last anywhere from 30 to 60 minutes depending on the age of your students. It also might be something where students have to build up stamina for. So at the beginning of your Readers Workshop at the beginning of the year, you may only have students work for, say, fifteen minutes. And then after they've shown that they can handle fifteen minutes with independent practice, then you can work it up little by little until you get to the goal time that you want your Readers Workshop to last for.
And then finally, you wrap up the workshop in the closing period. So during this time, students are going to come back together and they're going to share how that skill or strategy that you taught in the mini lesson worked for them during the work period. The closing, like the mini lesson, is going to be short: five, ten minutes max. What I like about the workshop model is that you can teach everybody the same skill or strategy and that skill or strategy can be applied and practiced in your guided reading time using the books that you're reading in guided reading. It can be applied in practice in the students individual books that they're reading on their own. So it's really nice how students can all learn the same skill and then take it back to their own individual reading and work on it on the level that makes sense for them.
Now, before I go any further, if Readers Workshop is completely new to you, then I would love to share with you my Teacher's Guide to Readers Workshop. It's just a free guide that I put together over on the website where I go into lots of details about what it is, how it works, and what it might look like in your classroom. It will cover some of the same things that I'm talking about on today's episode but you will have it for you to refer to again and again. In the guide I also give you ideas for what to do during each section of your workshop. There's also a video tutorial in there as well for how to schedule out the work period of your workshop, which I think is the trickiest part. So it's just packed full of information about using Reader's Workshop in your classroom. So just head to classroomnook.com/podcast/29 to get your hands on that Free Teacher Guide to Readers Workshop.
All right, so like most things in the classroom, there's usually some back end preparation that you need before you can do something new with your students and Readers Workshop is no different. Creating an atmosphere that is inviting for your readers is step one to getting started. Here are some things to consider, where will your classroom library be? I know that you probably already have that figured out, but it's worth mentioning here because you want your classroom library to be the centerpiece of your classroom. Picture what it's going to look like, what posters, what decorations, and what reading resources will you include for display? If you have a classroom theme or color scheme make sure to incorporate that into your classroom library as well with your book labels and decorations as well. You want your classroom library to be the most exciting place that your students will want to be.
Next, think about where will your students be allowed to read? Will you have pillows, carpet squares, and beanbag chairs as a fun way to get students excited about reading? Make sure you plan ahead for that and that you know what your expectations for that are going to be. Where will your students keep their independent reading books and materials? Some options for this include keeping reading bags in baskets or bins near the classroom library or even at their desks, as well as using binders or folders to create readers notebooks for their reading responses and activities. We're going to talk about readers notebooks in a second. So just hang tight. Think about how you're going to organize your classroom library books. You'll want to make sure that your classroom library houses books in a variety of topics, genres, authors, and, of course, reading levels. I have a blog post over on the Web site about how to create a diverse reading library. And I will link to that in the show notes at classroomnook.com/podcast/29. But you definitely want to make sure that you have a diverse library of books for your students to choose from. One of the easiest ways to organize and manage your books is by keeping them in bins or baskets, something that makes it really easy for them to finger through and find the ones that they want. Develop a system for checking books in and out of your classroom library. There are a number of digital tools for keeping track of your books, such as using a scanner like the IntelliScanner. I will link to that in the show notes but a scanner like that will allow you to create a digital database of all of your books. Or you can use an online catalog like the Booksource, Classroom Organizer, or there are even smartphone apps like iBookshelf, Book Crawler, and BookBuddy to help you keep tabs on your books. I will link to all of those managing tools inside of the show notes so make sure you check that out. Of course, there is always the good old fashioned way of signing in and signing out method using paper and pencil. But whatever you decide, you're going to want to teach your students your system to help minimize the likelihood that your classroom library becomes disorganized and that books go missing.
And finally, in preparation for setting up Readers Workshop in your classroom, I want you to think about where you will meet with your small groups because an important component of Readers Workshop is the time that you're going to be spending in small groups with students. So you'll need a special place in your classroom, preferably a small table where you can read and discuss and do activities together. In this area, you will want to have easy access to your teaching tools and supplies, such as sticky notes, chart paper, whiteboards, pencils, papers that you would use when teaching your students in small groups. So there is definitely a fair amount of thought and preparation that needs to go into planning to set up Readers Workshop in your classroom. Make sure you spend some time doing that so that you can start off successfully.
Once you have an idea of what your workshop model is going to look like physically in your classroom, let's talk nitty gritty. Specifically, I want to talk about launching your Readers Workshop at the beginning of the school year when you're getting started. Your workshop may look slightly different than the rest of the year as you slowly introduce each component of Readers Workshop. It's so important that you take your time here and that you don't rush into getting into the actual content of reading skills and reading strategies but that you actually take a fair amount of time introducing the routines, the procedures, and the formatting of the workshop to your students so that you can set that foundation first. It will save you a whole lot of headache later on in the school year once your students have that part under their belt, then you can focus on the actual skills and strategies that your curriculum requires. You want to get your workshop running like a well oiled machine and then you can get into the specifics of content and curriculum. In fact, if you're gonna do it right, you will likely spend an entire month just introducing the format and the flow of Readers Workshop to your students. I know, did your mouth just drop? I know it sounds like a lot of valued time that you may feel you're wasting and not getting into the curriculum but trust me on this one, you will thank yourself later because you won't be backtracking to reteach routines and procedures of Readers Workshop. Take the time at the beginning of the school year. It doesn't mean that in these first 30 days or four weeks, whatever it is, that you're not doing anything reading related, it just means that everything that you're doing brings students back to the functions, the format, and the flow of Readers Workshop. Now, let me suggest that you wait until the first full week of school to launch Readers Workshop. Oftentimes we start school on a Wednesday or Thursday, I found that if we started with only a couple days in the week, the weekend was just enough time for students to forget everything that you've taught them. So just wait until you have that first full week of school before you start launching Readers Workshop.
For those first four weeks or so, your mini lessons are going to be all about your behavioral expectations and your routines and procedures for Readers Workshop. So let me give you some examples. On day one of your Readers Workshop, your mini lesson is 'What is Readers Workshop?' You're going to give them an overview much like I just gave you about the three components, the mini lesson, the work period, and the closing. You're going to go into detail about the types of activities and the things that are going to be happening in each section. Day two, you might introduce your readers notebook. And again, we're going to talk about that in a second. You're gonna have your students actually put together their readers notebook and you're gonna go over the components. The third day may be talking about how to choose 'Just Right' books. The fourth day might be about how to plan and work towards reading goals. The fifth day might be what are reading genres and let's explore some, things like that. We are covering reading topics, but you're not necessarily getting into your guided reading groups yet or having students really dive into reading skills and strategies yet. Other topics you might cover in Reader's Workshop include things like taking care of yourself during Readers Workshops so that you're minimizing the interruptions that would happen during independent reading or during your guided reading time. You might talk about your partner reading expectations and procedures or explicitly teaching how you want them to make reading responses in their readers notebook. So a lot of those first few weeks are really focusing on behaviors and routines but you do mix in time where students can actually get their hands on books like in the lesson where you might be teaching them choosing "Just Right" books. This mixture is important to help students to begin to get excited about reading and let's them just get their feet wet by allowing them to get their hands on the books that they will potentially be reading as they get started in the school year.
Now, following your mini lessons, students are going to be completing different activities in the work period that's going to help them practice the skill or the behavior that you taught during the mini lesson. So, for example, in the lesson where you might talk about taking care of yourself during Readers Workshop, well, during their independent reading time they're gonna be reading a book that maybe they've chosen to start the year off with. They're going to be modeling that behavior or they're going to be practicing and hopefully modeling that behavior that you have expressed as your expectation for behaviors during readers workshop. Whatever activity that you give them to do during that first few weeks of work period time, you want to make sure that it is simple because you want them to focus more on how they're behaving and acting more so than the actual assignment itself. I know that seems a little backwards, but trust me here, start with the behavior expectations and then ease into teaching actual skills and strategies.
Now, if you listen to the episode that I did back in Episode 27 on Classroom Management, you likely remember me talking about the 'looks like and sounds like' chart. Well, this is a chart that I use anytime I am introducing something new to my students as far as behavior expectations go. To help them know exactly what I expect whatever they're doing to look like and what it should sound like. So when you're sending your students off for the first few times into their work period, you want to explicitly teach what this should look like and what it should sound like so that they know exactly your expectations and what you are expecting of them during that time. I cannot stress enough about taking it slow at the beginning. Resist the temptation to jump with both feet into all the things in Readers Workshop and just do one thing at a time. At the beginning, the work period should really just be mostly independent work, maybe a few small group activities, but hold off on things like centers and even your guided reading groups until you get the basics down first. You likely won't be even ready to do reading groups yet until you do some of those baseline reading assessments and observations that will then inform your decision about the groups that you're going to form anyway. So take your time since you're not meeting with anybody during that work period, take that time to observe and to walk around and kind of just listen in on students as they're doing the activities independently at their seats. The same holds true for centers. Again, like I said, hold off on centers until you've really covered the basics of your routines and your procedures. Then after the first few weeks or so, you can slowly start introducing different centers. And again, only introduce one type of center at a time. Have all students only do the listening center for a week, then only do the writing center or whatever centers that you have. Just do one at a time so that you can really have students focus on it. Know the expectations for that center then you can slowly introduce more centers and get a little bit more up and running.
OK. I've mentioned a couple times about using a readers notebook so let me give you some details about what a readers notebook is and how you would use it in your classroom. The readers notebook is going to be your students go-to tool that they will be using every single day inside of Readers Workshop. They keep all of their activities and their responses, they write down their goals and keep track of their reading progress all in their readers notebook. And for me, I divided my readers notebook into four different sections that students would keep track of different things in. The first section is their reading goals and progress. The second section of their notebook was reading records. The third section was reading responses. The last section was reading resources. I have a free video tutorial that walks you through my readers notebooks. You could see what it looks like and what goes inside. I will link to that video over in the show notes at classroomnook.com/podcast/29 so if this sounds like something that you want to start to implement in your classroom, definitely check out that video. There is also a free resource in there for you with a teacher's guide for how to create your own readers notebook. If you're looking for a readers notebook that's already done for you with the components that I just mentioned, I will link to that resource in the show notes as well. It includes both a printable and a digital version of a readers notebook that you can use with your students. So check out those resources over in the show notes. And again, as we've been talking about explicitly teaching the procedures and the routines of Readers Workshop, you are likely going to spend an entire day in your mini lesson and in the work period using, setting up, and practicing using the readers notebook so that you're not just giving them this notebook to then tuck away and assume that they know how to use it. You're going to go over the readers notebook with your students talking about the different components and telling them what they will be using each section for in a couple of weeks. I actually have an entire episode planned for you to go even more in-depth into how to use a readers notebook with your students. So if this is kind of peaking your interest a little bit, stay tuned and I will cover that in full detail in a couple weeks with using our readers as well as a writer's notebook in your classroom.
All right, let's move on. We've covered a lot of information so far so if you need to pause this episode and go grab a glass of water, go for it. I will be here waiting. We've talked a lot so far about the foundation of setting up your workshop, what it's going to look like, and some of the components of your workshop. Now, I would like to give you an overview of what it looked like in my own classroom with everything that we've talked about so far. I must admit, my workshop didn't always look like the things that we've talked about. Although my workshop always had those three main parts: the mini lesson, the work period, and the closing, the time frames and the activities would vary, especially at the beginning of the year, as I've already discussed. I also decided that if I was going to use a workshop model, I was going to make it work for me and for my students. I wasn't going to be confined to a strict set of guidelines that weren't going to help me meet the needs of my students. If you think about everything that you should do for your reading instruction, we're talking about small groups, conferences, independent practice, it can be really difficult to juggle it and fit it all into your Readers Workshop. So here's just what I did to get the job done. And of course, you're going to make it work for you and your students.
So here's what it looked like in my classroom. Each morning when my students arrived, they would go over to our designated area where we kept our reading bags and they would start independently reading at their seats or around the room. Again, this is a routine that we would teach at the beginning of the school year so they knew what to expect and what I was expecting of them. Although this time wasn't always part of our Readers Workshop specifically, I still had them begin with reading because I never felt like we got enough reading time during the actual Readers Workshop of our classroom so by having them start with reading, this was was an easy way to sneak in some extra reading into the day. After I would complete my morning routine with things like taking attendance and checking homework and so on I would then begin conferencing with students as they were reading. Because so much of my time during the work period of Reader's Workshop was spent meeting in small groups, I found that I didn't have a lot of time for actual conferencing so this was my solution for fitting reading conferences in during our day. I would typically put up the names on my smart board of the students that I was planning to conference with that morning so that students knew what to expect. I also kept my own schedule in my own readers notebook to make sure that I was meeting with each student regularly. Now, Monday through Thursday, I would follow the workshop guidelines that I've talked about by dividing my Readers Workshop into those three sections. The mini lesson I would always model a reading skill or strategy in a whole group setting. The work period usually consisted of me meeting with two guided reading groups about 20 minutes each. While I was meeting with groups, other students were working on other reading tasks or reading with partners or even independently reading again completing different reading activities. I would use a pocket chart system to let students know what they were doing during that work period, whether they would be meeting with me or doing another reading activity. In my guided reading groups we would practice that same reading skill or strategy that I was teaching in the mini lesson, but we would be doing it using a text that was at that group's particular reading level. I also would use this time to address specific needs of the students in that group based on my observations of them as readers, either during our conference time or during other times that I observe them reading and working on reading activities. Now I put together a video tutorial again about how I scheduled out my Readers Workshop Monday through Thursday so if you want to check out that video and really see how I used a pocket chart to organize and schedule out my Readers Workshop, head over to the show notes at classroomnook.com/podcast/29. I've put that video inside our Members Resource Library for you to check out. That was Monday through Thursday we had our guided reading groups and our independent reading and partner reading going on at the same time. Now on Fridays we did just centers. Now here's the thing, I tried doing centers all week long and have students work on centers while I was meeting with guided reading groups but here's why it didn't work for me. Number one, it got way too noisy. Even if the students were on task with 20 students, 'quietly working at their centers', it got very distracting from my guided reading students. I would often get super frustrated thinking that they weren't on task. In reality, they might have just been getting excited about something that they're doing at the centers so they would be talking about it with their classmates. But to me, it just was so distracting so it just didn't work out. I was frustrated. I was constantly telling my students to quiet down and it just wasn't working. It also didn't work because I would be getting interrupted all the time for whatever reason, like, you know, a fire drill or something and that would then cause those students to miss that center. Then if we moved on to the next day, they would have missed that center for the week and then they would just have to be playing catch up. So that was always really frustrating. In addition, I would have to find time to teach students what to do in those centers, so if I was expected to teach my mini lesson and go over the centers for the week, that was really time consuming. If I was trying to keep within my ten to fifteen minute mini lesson, it was really hard to fit it all in and then send them on their way. It just cut into our work period and it was just too much to fit in. To be honest, it didn't work for me because it just made my head spin, there was just too much going on at once. I knew if that I was feeling that way, that many of my other students were feeling that way as well. So again, that's what I love about Readers Workshop, there is no right or wrong way to do it. You've got to find a way that works for you and your students and it just didn't work for me to fit centers in through the rest of the week, so we just did them on Fridays. Then on Fridays, my mini lesson, all I needed to do was go over the centers, the rules, the directions, and the expectations for those centers. It was also nice to do centers on Friday because then that means that they could practice in all of the different centers the skills that we had been practicing all week. The centers then just served as a really nice way to assess what they've learned and how well they can apply that skill or strategy that I had been teaching so working on centers on Fridays was just a really great win for us.
Once I had gone over these centers in our mini lesson, then during the work period, all of my students would be rotating around between four or five centers depending on the week. Then I could assist and monitor and help out when needed. Usually more assistance would be needed at the beginning of the year, and then as we went through and we got used to using centers in our classroom, it became a time where students could really just be independent and get started all on their own without much assistance from me. And then because I wasn't meeting with guided reading groups on Fridays, I was able to pull out students who needed extra help in the centers or work with some really high needs students academically and behaviorally so it was just a really good fit and we all kept our sanity.
Now, if you are wondering what kind of centers I did, I covered a whole bunch of that in my Free Teachers Guide for Readers Workshop so if you want to see some really great examples or some things that you might be doing during the work period of your Readers Workshop, make sure you get your hands on that Free Teachers Guide for Readers Workshop and again, that's over at the show notes at classroomnook.com/podcast/29.
OK. So there you have it my Readers Workshop from top to bottom. I know it's a lot and if I'm being completely honest with you, it looks a lot better written down than it did in real life, at least at first. So having a smooth Readers Workshop takes a lot of practice for you and your students. It's a lot to juggle and figure out. And as I mentioned, you have to find the structure and the routine that works for you. When you're just starting out doing Readers Workshop, what you're doing in September may look completely different than what you're doing in April and May. If you're doing this for the first time, be gracious to yourself, give yourself time to work out the tweaks and get it to your liking so that every year as you introduce Readers Workshop, you get better and better and you know more and more what works well for you in your classroom.
And if you're like me, it really helps to have some resources that lay it all out for you. I've mentioned a whole bunch of resources in this episode and I will link to all of them in the show notes at classroomnook.com/podcast/29. If you would like a hand held experience where I walk you through exactly what to do in Readers Workshop. Even more detail than we went into today, you can check out my getting started in Readers Workshop comprehensive unit that walks you through step by step how to get Readers Workshop up and running in your classroom. It comes with all of the teacher lesson plans that you're going to be doing during those first few weeks. It comes with all of the materials for your student readers notebook and activity sheets, teacher guides, video tutorials, observations, sheets, small group teaching forums, all your anchor slides that you're going to use in many lessons and a bulletin board set along with a whole lot of other resources. It gives you everything that you need to get started with Readers Workshop in a stress free way. I've done a lot of trial and error, so this comprehensive unit is the result of all the mistakes that I've made so that you don't have to. If you want to check that out, head to the show notes and I will link to that resource in the show notes so that you can get started with success.
Now, with all that said, everything that we've covered, you might be thinking, what happens if I have to start my school year, virtually? OK. Don't panic. We can do this. Back in the spring when we launched into Distance Learning. I did several episodes about how to continue what you're doing in the classroom, but do it virtually instead so check out all of those resources. I also wanted to say that there is one resource in our Members Resource Library that is actually one full week of online Readers Workshop. Now, you may not be able to start the year off with this particular resource, but I would encourage you to go check it out because you will see how you might turn Readers Workshop into a virtual format using what I've created as your model. And of course, you can use what I've created as well, that's what it's therefore, it's free. But you might say, OK, this is how she did it. These are the videos and the way that she set it up in Google Classroom, how can I do that for myself as well? Go check out that free resource in our Members Resource Library. I will link to that in the show notes at classroomnook.com/podcast/29. Once you've checked it out and you see how it works then do that with your own readers workshop that you're planning for the beginning of the school year. And also I wanted to mention that my getting started with Readers Workshop unit is also available with digital components as well so you can use that over at Google Classroom or your learning platform of choice using Google Slides if you need to use virtual teaching in the fall. So before you panic, let's just figure it all out. We can do this. Use what I've created as a model and then do it for yourself as well. You've got this.
Now, if you liked this episode and found it valuable, then stay tuned for next week because I'm going to cover how do launch Writers Workshop in your classroom as well. If you're going to do Readers Workshop, it only makes sense that you do Writers Workshop as well, because there's a lot of the same components and it just offers a lot of consistency for your students so stay tuned to next week for that. I can't wait to check in with you again next week and give you all the details about Writers Workshop. Have a great rest of your week. Bye for now.
Automatically convert your audio files to text with Sonix. Sonix is the best online, automated transcription service.
Sonix uses cutting-edge artificial intelligence to convert your mp3 files to text.
Manual audio transcription is tedious and expensive. Sonix converts audio to text in minutes, not hours. Better audio means a higher transcript accuracy rate. Are you a radio station? Better transcribe your radio shows with Sonix. More computing power makes audio-to-text faster and more efficient. Do you have a podcast? Here's how to automatically transcribe your podcasts with Sonix. Sonix has the world's best audio transcription platform with features focused on collaboration. Sometimes you don't have super fancy audio recording equipment around; here's how you can record better audio on your phone.
Sonix uses cutting-edge artificial intelligence to convert your mp3 files to text.
Sonix is the best online audio transcription software in 2020—it's fast, easy, and affordable.
If you are looking for a great way to convert your audio to text, try Sonix today.